Looking to add a functional and inviting touch to your outdoor space? This DIY fire pit project is the perfect solution! Learn how to upcycle an old steel drum into a practical fire pit. Follow our simple steps to create a warm gathering spot for friends and family.
Procedure for Creating DIY Fire Pit
Tools Required
The following are the list of tools you will need to convert a steal drum into a DIY fire pit:
- Eye Protection
- Ear Protection
- Gloves
- Angle Grinder
- Grinding Wheel
- Cut-Off Wheel
- Drill
- Drill Bits / Step-Bits
Steps
Step 1 – Cut the Steel Drum
The first step is to cut the steel drum down to size. For my DIY fire pit I ended up cutting it just above the lower ridge that went around the drum. this left me with the bottom 1/3 of the total steel drum.
To cut I used a grinder with a metal cut-off wheel. The following picture shows the actual cut-off wheel I used.
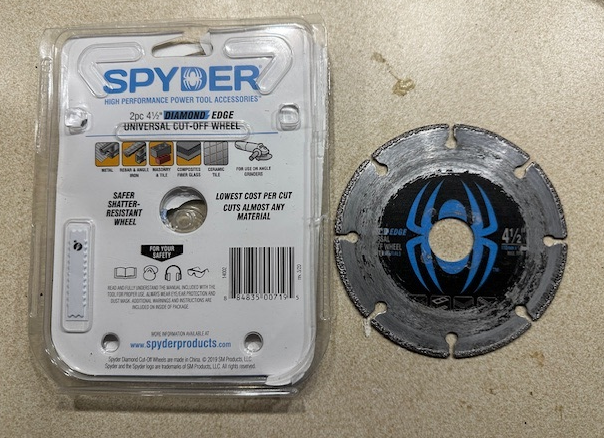
WARNING: Cutting the steel drum will produce a lot of sparks as well as small pieces of metal debris. This process will also be loud. Make sure to where the proper protection: gloves, eye protection, ear plugs, long sleeve shirt and pants.
Slowly go around the circumference of the steel drum. I laid the drum down sideways on a soft mat and cut in sections. Halfway through the process I took a break to allow the grinder and cut-off wheel to cool down.
Step 2 – Smooth Out Cut
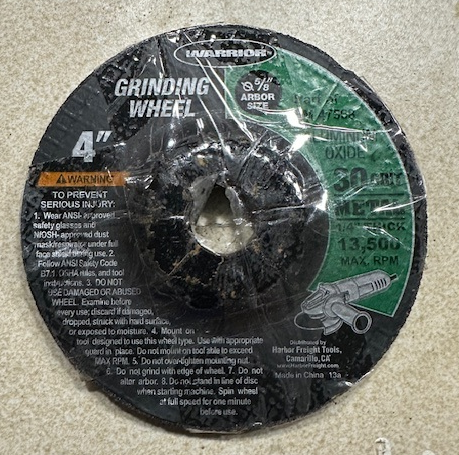
After you separated the smaller section that will be the fire pit, it is time to clean up the rough edge you just produced. To do this you will want to use a grinding wheel on the grinder. Below is the wheel that I used which was designed for metal and had a grit of 30. It worked pretty well, but you still need to be careful handling the fire pit to avoid cutting yourself.
Step 3 – Make a Few Air Vents
Incorporating air vents in your fire pit design enhances its performance, safety, and overall functionality, making for a more enjoyable and efficient outdoor experience.
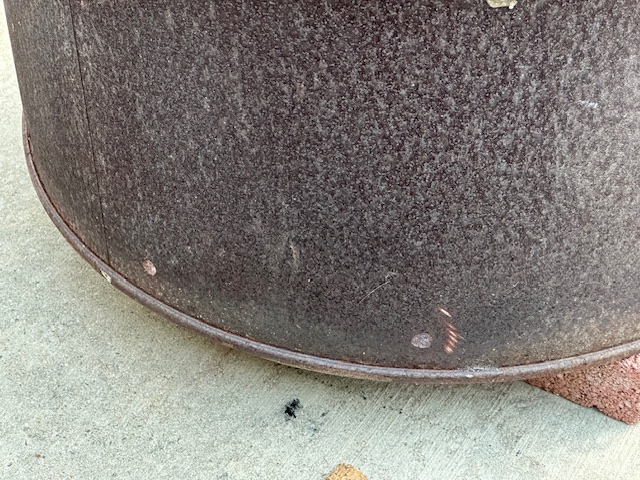
In order to create air vents you will need to use a drill to drill a handful of holes around the base of the steel drum fire pit. You may need to first use a standard drill bit to create a pilot hole and then use a step-bit to increase the size of the hole.
Step 4 – Move to Preferred Location
It is now time to move the DIY fire pit to your backyard or other preferred location. Be careful when moving the fire pit as the top edge where you cut may still be pretty sharp even after grinding it down a bit.
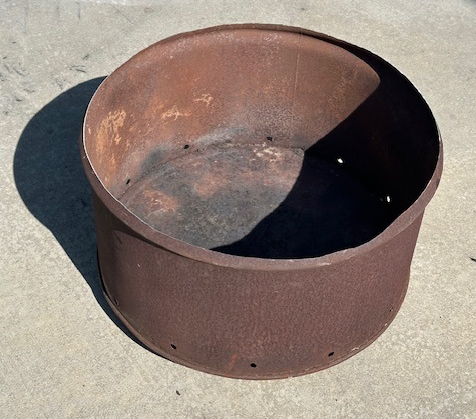
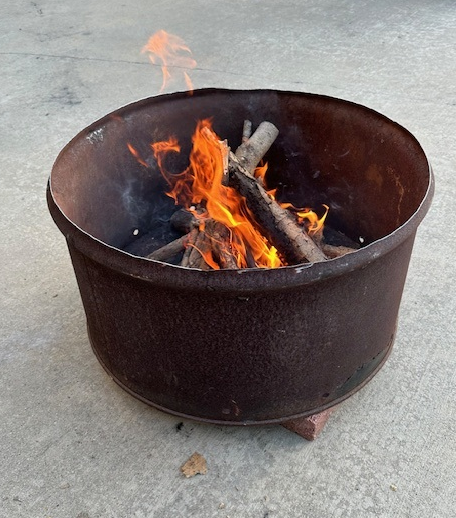
I suggest placing the fire pit off the ground a little bit to keep the heat away from the ground. I had some landscape bricks that I utilized for this.
Step 5 – Enjoy!
The hard work is over and now it is time to enjoy your new creation! Get some wood lighted and get those S’mores cooking!
Conclusion
Creating your own DIY fire pit from a used steel drum not only adds a functional centerpiece to your outdoor space but also embodies the spirit of upcycling. By repurposing materials, you’ve not only saved money but also contributed to environmental sustainability. Remember, with proper ventilation through air vents, you ensure efficient combustion, better temperature control, and a safer fire pit experience. Whether it’s for cozy evenings or lively gatherings, your transformed steel drum fire pit promises warmth and ambiance for many memorable moments ahead.




Leave a Reply