Anyone who’s driven an RV knows that things can get a little… lively inside the cabin, especially on less-than-perfect roads. One of the biggest culprits for me was my phone mount. I’d been using an iOttie automatic clamping dashboard mount with wireless charging, and while it was great in my car, the long arm proved to be its downfall in the motorhome. The constant shaking and bouncing meant my phone would eventually pop out, which is not ideal when you’re relying on navigation!
I knew I needed a more robust solution that wouldn’t succumb to the vibrations of RV travel. My goal was simple: get rid of that long, shaky arm and create a truly stable platform for my phone.
Here’s how I tackled the problem and what you’ll need if you’re looking to do something similar:
The Upgrade Components:
- Aluminum Alloy Mount with 17mm Ball Adapter: I specifically looked for a mount made of a solid material like aluminum alloy for minimal flex, and the 17mm ball adapter is pretty standard for many phone holder attachments.
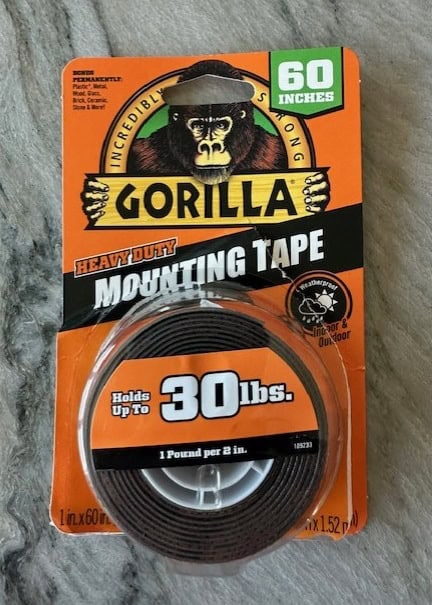
- Heavy-Duty Gorilla Glue Double-Sided Tape (rated up to 30 lbs): This was key! Forget the flimsy tape that often comes with mounts. You need something seriously strong to withstand RV vibrations.
- Rubbing Alcohol: For properly cleaning the dashboard surface.
- Short USB Cable: To keep things tidy and avoid excess cable flopping around.
The Installation Process:
- Prep the Surface: First things first, I thoroughly cleaned the section of my dashboard where I planned to install the mount using rubbing alcohol. This removes any dust, grime, or old adhesive residue, ensuring the new tape gets the best possible grip. Don’t skip this step – it’s crucial for adhesion!
- Locate the Sweet Spot: Before applying any tape, I spent some time finding the optimal location on my dash. I considered visibility, accessibility, and making sure it wouldn’t obstruct any vents or controls.
- Apply the Tape to the Mount: I cut the heavy-duty Gorilla Glue double-sided tape to fit the base of the aluminum alloy mount and applied it firmly.
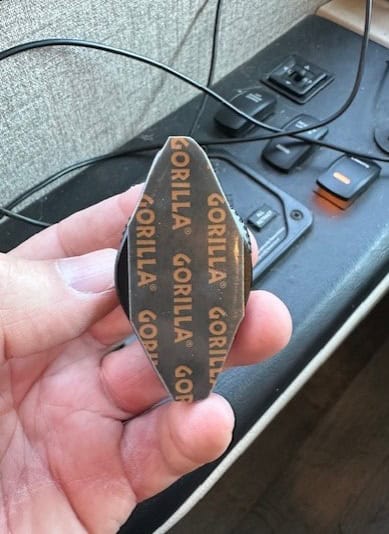
- Secure to the Dashboard: Once the tape was on the mount, I carefully positioned it on the chosen spot on the dashboard and pressed down firmly for about 30 seconds to ensure good contact.
- Cure Time is Crucial: This is where patience pays off! I let the mount sit overnight without attaching the phone holder part or my phone. This allows the adhesive to fully cure and create a strong bond. Check the instructions on your specific tape for recommended cure times, but generally, longer is better.
- Final Assembly & Power: The next day, with the base securely attached, I simply snapped on the rest of the phone holder. I then used a short USB cable to plug into a conveniently located USB outlet near my dash for charging.
The Result:
This new setup is a night-and-day difference! Without that long arm acting like a lever, the phone is much more stable. I’ve taken it on a few drives now, and my phone stays put, no matter how bumpy the road gets. If you’re struggling with a shaky phone mount in your RV, I highly recommend adopting a similar approach. It’s a relatively inexpensive fix that makes a huge difference in convenience and peace of mind on the road.



Leave a Reply