

Drying hops is a crucial step in homebrewing, ensuring that your hops retain their flavor and aroma for the perfect brew. While there are various methods to dry hops, using a dehydrator is one of the most efficient and reliable ways to achieve consistent results. In this guide, you’ll learn the best techniques for drying hops in a dehydrator. Preserve freshness, enhance flavor, and ensure your homebrewing ingredients are ready for brewing. Whether you’re a seasoned brewer or just starting, mastering this process will elevate your brewing game.
Why Proper Hop Drying Matters: Key to Quality Brewing
Drying hops is more than just a preservation step; it’s a critical process that directly impacts the quality of your homebrew. Freshly harvested hops contain a significant amount of moisture, which, if not removed, can lead to mold growth and spoilage. This not only wastes your valuable hops but can also ruin the flavor and aroma of your beer.
By properly drying hops, you reduce their moisture content to a stable level, which preserves their essential oils and resins—key components responsible for the bitterness, flavor, and aroma in beer. This process ensures that the hops retain their potency, allowing you to achieve the desired balance and character in your brew.
Moreover, dried hops are easier to store and have a longer shelf life, giving you the flexibility to brew at your convenience without worrying about degradation. Whether you’re crafting a crisp IPA or a rich stout, properly dried hops are essential for maintaining the consistency and quality of your homebrewed beer.
Choosing the Right Dehydrator
Selecting the right dehydrator is a crucial step in ensuring that your hops are dried evenly and efficiently. With various models available, it’s important to choose one that suits your needs and delivers consistent results. Here’s what to consider when picking the best dehydrator for drying hops:
1. Types of Dehydrators
There are two main types of dehydrators: stackable (vertical airflow) and shelf (horizontal airflow) models.
- Stackable Dehydrators: These are typically more affordable and compact, making them a popular choice for beginners. However, they may require more attention to ensure even drying, as the air flows from the bottom up, which can lead to uneven moisture removal if trays are not rotated.
- Shelf Dehydrators: These models offer horizontal airflow, which tends to provide more uniform drying across all trays. They are generally more expensive but are highly recommended for those looking to dry larger quantities of hops consistently.
2. Key Features to Consider
When selecting a dehydrator for hops, focus on the following features:
- Temperature Control: Hops should be dried at a low temperature (ideally around 95-115°F) to preserve their delicate oils and resins. Look for a dehydrator with adjustable temperature settings to ensure you can maintain the ideal drying environment.
- Air Circulation: Consistent airflow is essential for even drying. A dehydrator with a powerful fan and good ventilation will help remove moisture more efficiently and prevent hotspots or under-dried areas.
- Capacity: Consider how many hops you plan to dry at once. If you’re dealing with large batches, a dehydrator with multiple trays or a larger drying area will save you time and effort. For small-scale brewers, a compact model with a few trays may suffice.
- Ease of Use and Cleaning: Removable trays and easy-to-clean surfaces are practical features that make the drying process more manageable, especially if you’re drying hops frequently.
3. Recommended Dehydrator Models
If you’re looking for specific recommendations, some popular dehydrators among homebrewers include:
- Excalibur 9-Tray Electric Food Dehydrator: Known for its even drying and adjustable temperature control, this shelf model is ideal for large batches of hops.
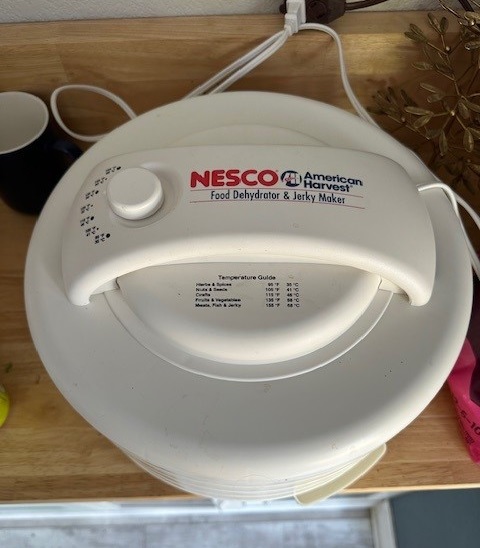
- Nesco Snackmaster Pro: A stackable model that’s budget-friendly and compact, perfect for beginners or those with limited space.
- L’EQUIP FilterPro Dehydrator: A mid-range option that combines good capacity with reliable performance, suitable for hobbyists with moderate drying needs.
The dehydrator I use is the Nesco FD-60 Snackmaster Express. I think we obtained this as a wedding gift or to possibly make beef jerky and we never used it until I started growing hops. It works great for my needs as I usually do not have a large harvest living in Southern California.
Choosing the right dehydrator is essential for maintaining the quality of your hops. By investing in a model that meets your specific needs, you can ensure that your hops are dried to perfection, ready to enhance your next brew.
Preparing the hops for drying
Before you begin the drying process, it’s important to properly prepare your hops. This ensures that they dry evenly and maintain their quality, which is crucial for brewing. Here’s how to get your hops ready for the dehydrator:
1. Harvesting at the Right Time
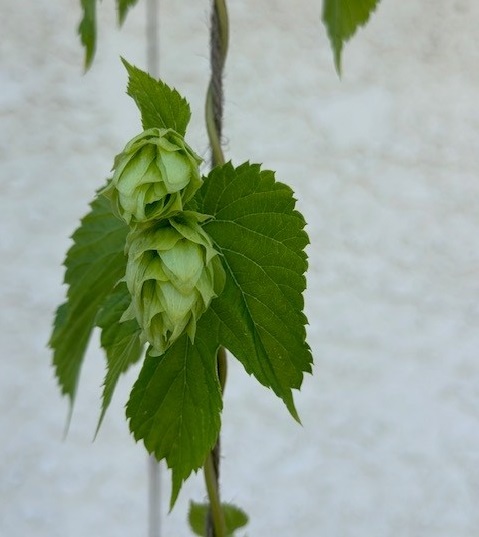
- Check for Ripeness: The first step in preparing hops for drying is to harvest them at the optimal time. Hops are ready to be picked when the cones are firm but slightly springy to the touch, and the lupulin glands inside (the yellow powder) are fragrant and sticky. The edges of the cone petals should start to brown, indicating maturity.
- Avoid Overhandling: When harvesting, handle the cones carefully to avoid bruising them, which can damage the essential oils and resins that contribute to their aroma and bitterness. Use clean, sharp shears or scissors to snip the cones from the vine, leaving a small stem attached.
2. Cleaning and Inspecting the Hops
- Remove Debris: After harvesting, inspect the hops for any debris, such as leaves, stems, or insects, that may have been picked up. Gently remove these to ensure only clean cones are placed in the dehydrator. This step is crucial, as debris can affect the drying process and potentially introduce off-flavors to your hops.
- Avoid Washing: While it might be tempting to rinse the hops, it’s best to avoid washing them as this can introduce excess moisture that complicates the drying process. If the hops are visibly dirty, gently brush off any dirt or dust with a soft brush.
3. Sorting and Trimming
- Sort by Size: For more consistent drying, consider sorting your hops by size. Smaller cones may dry faster than larger ones, so separating them can help ensure an even drying process.
- Trim Excess Stems: If any cones have long stems attached, trim them down to a manageable length. While a small stem is fine and can help with handling, excessive stems can take up space and may dry at a different rate than the cones, potentially affecting the overall drying efficiency.
4. Pre-Drying Tips
- Spread Hops in a Single Layer: Whether you’re drying hops on a screen or in a dehydrator, spread them out in a single layer to ensure good airflow around each cone. This helps prevent uneven drying and potential mold growth.
- Pre-Drying in the Shade (Optional): If you’re dealing with a large harvest and can’t dry everything at once, consider pre-drying your hops in a shaded, well-ventilated area for a few hours before placing them in the dehydrator. This can help reduce moisture content slightly and ease the dehydrator’s workload.
Properly preparing your hops before drying is essential for preserving their quality. By carefully harvesting, cleaning, and sorting your hops, you’ll set the stage for a successful drying process, ensuring that your hops retain their flavor, aroma, and brewing potential.
Drying hops in a dehydrator
Using a dehydrator to dry hops is an efficient and reliable method that helps preserve their essential oils and aromas, making them ready for your next brew.
1. Setting Up the Dehydrator
- Preheat the Dehydrator: Before placing your hops in the dehydrator, set it to a low temperature, ideally between 95°F and 115°F (35°C to 46°C). This temperature range is gentle enough to dry the hops without compromising their delicate oils.
- Prepare the Trays: Arrange the trays in your dehydrator so they are ready for the hops. Ensure the trays are clean and free from any residues that might affect the hops’ flavor.
What Temp to Dehydrate Hops? A low temperature between 95°F and 115°F is ideal.
2. Preparing the Hops
- Inspect and Clean: Before drying, inspect the hops for any debris, leaves, or stems that might have been picked up during harvesting. Clean them gently if necessary, but avoid washing them as moisture can hinder the drying process.
- Spread Hops Evenly: Place the hops in a single layer on the dehydrator trays. Avoid overcrowding, as this can lead to uneven drying. Each cone should have enough space for air to circulate freely around it.
3. Drying Process
- Monitor Temperature and Time: Set the dehydrator to the desired temperature and let it run. The drying process typically takes between 8 to 12 hours, depending on the hop variety and moisture content. It’s important to check on the hops periodically to ensure they are drying evenly.
- Rotate Trays (If Necessary): If you are using a stackable dehydrator, consider rotating the trays halfway through the drying process. This helps to ensure that all hops dry at the same rate, especially if your dehydrator has uneven airflow.
- Check for Dryness: The hops are ready when the cones are dry and papery to the touch, and the central stem inside the cone is brittle. To test, squeeze a cone; it should feel light and crisp, not damp or spongy.
How long to dehydrate hops? Dehydrating hops will take a good part of the day to complete, ~8-12 hours. I recommend letting them go overnight.
4. Post-Drying Care
- Cool the Hops: Once the hops are fully dried, remove them from the dehydrator and allow them to cool to room temperature. This prevents condensation from forming when they are stored.
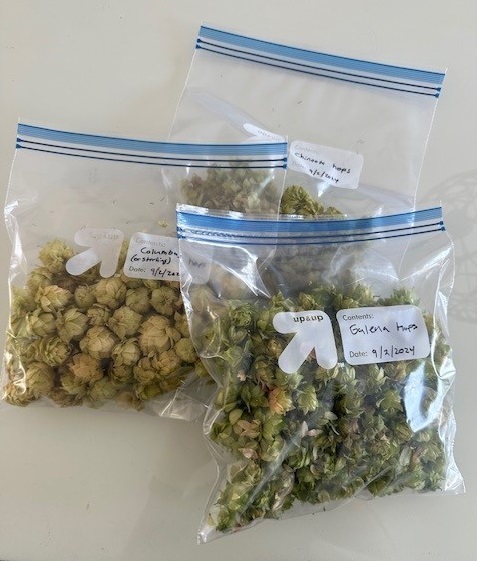
- Store Immediately: Transfer the cooled hops into airtight containers or vacuum-sealed bags as soon as possible to preserve their freshness. Proper storage is key to maintaining the quality of the hops after drying.
Storing Dried Hops
Once your hops are properly dried, the next crucial step is storing them in a way that preserves their potency, flavor, and aroma. Proper storage ensures that your hops remain fresh and ready to use in brewing, even months after drying. Here’s how to store your dried hops to maintain their quality:
1. Best Storage Practices
- Use Airtight Containers: The most important factor in storing dried hops is keeping them in an airtight environment. Exposure to air can lead to oxidation, which degrades the hops’ essential oils and reduces their effectiveness in brewing. Vacuum-sealed bags are ideal, as they remove most of the air, keeping your hops fresh for longer. If vacuum sealing isn’t an option, use airtight jars or containers with minimal headspace.
- Cool, Dark Storage: Hops are sensitive to light and heat, both of which can accelerate the degradation process. Store your containers in a cool, dark place, such as a refrigerator or freezer, to slow down the aging process and maintain their freshness. The lower the temperature, the longer your hops will stay fresh.
- Avoid Moisture: Even after drying, hops can still absorb moisture from the environment, which can lead to mold growth or spoilage. Ensure that your storage containers are completely dry before sealing them, and keep them in a dry environment to prevent moisture from re-entering.
2. Shelf Life of Dried Hops
- Optimal Storage Duration: When stored properly, dried hops can maintain their quality for up to a year or more. However, for the best brewing results, it’s recommended to use your hops within six months. Over time, the potency of the hops will gradually decline, which may impact the flavor and aroma they impart to your beer.
- Signs of Degradation: Even with proper storage, hops will eventually begin to degrade. Watch for signs such as a faded color, a musty or stale smell, or a noticeable loss of aroma. If you notice any of these signs, your hops may have lost their effectiveness and should be replaced.
3. Rehydrating Dried Hops (If Necessary)
- When and How to Rehydrate: While dried hops are typically used as-is in brewing, there may be times when rehydration is needed, particularly if your recipe calls for fresh hops. To rehydrate, simply soak the hops in a small amount of warm water for a few minutes before adding them to your brew. However, this is generally not necessary for most brewing processes.
Conclusion
Drying hops in a dehydrator is a crucial step in preserving their quality, ensuring that they retain the flavors and aromas that will enhance your homebrewed beer. By understanding the importance of proper drying, choosing the right dehydrator, and following the best practices for preparation and storage, you can confidently process your hops and maintain their brewing potential.
With the knowledge and techniques outlined in this guide, you’re well-equipped to dry your hops effectively. Whether you’re a seasoned homebrewer or just starting, these steps will help you achieve consistent, high-quality results. Properly dried and stored hops will reward you with a brew that reflects the freshness and care you put into your craft. So, get ready to enjoy the fruits of your labor in your next batch of homebrew, knowing that your hops are prepared to perfection. Cheers!


Leave a Reply