

Installing a TV outside on stucco can be a great way to enjoy your favorite shows and movies in the fresh air. However, it’s important to do it right, so that your TV is secure and protected from the elements. This guide will provide an overview on how to install a tv outside on stucco.
Pre-Installation preparations
Before embarking on your outdoor TV installation journey, it’s essential to lay a strong foundation by making informed decisions and performing thorough assessments. Proper pre-installation preparations will set the stage for a successful and enjoyable outdoor TV experience. Let’s delve into the key considerations:
Assess the outdoor area for TV
Start by evaluating the outdoor space where you intend to install the TV. Take into account factors such as:
- Weather Exposure: Consider the climate of your region. Is the installation area prone to rain, snow, or extreme temperatures? Weatherproofing measures will vary based on these conditions.
- Viewing Angles: Determine the optimal viewing angles for the TV. Consider the seating arrangement and ensure that the TV will be easily visible from various spots in your outdoor living space.
- Sunlight and Glare: Note the direction of sunlight throughout the day. Avoid installing the TV in direct sunlight to prevent glare and reduce strain on your eyes when watching.
- Power Sources: Check for nearby power sources. Depending on the TV model and setup, you might need access to electrical outlets for power.
Select an appropriate TV for outside
Choosing the right TV is paramount for a successful outdoor installation. Consider the following:
- Weatherproof or Outdoor-Rated: Opt for a TV specifically designed for outdoor use. These TVs are built to withstand exposure to the elements, including moisture, temperature fluctuations, and UV rays.
- Size and Resolution: Select a TV size that complements your outdoor space. Additionally, choose a resolution that suits your viewing distance to ensure a clear and immersive visual experience.
- Smart Features: Look for smart TV features that allow you to access streaming services and online content directly from the TV.
DIY Pro TIP: Look for a used TV through sites like Facebook Marketplace or Craigslist. I found a nice 55″ smart TV for $40 and the guy even threw in a floor cleaner for no additional charge!
Select appropriate TV mount
Selecting the right TV mount is a crucial step in ensuring the stability, functionality, and overall success of your outdoor TV installation on stucco. The choice of mount not only affects how well your TV is secured but also influences the viewing experience and the flexibility of your setup. Let’s explore the different types of TV mounts and their suitability for stucco surfaces:
Types of TV mounts:
- Fixed Mounts: Fixed mounts hold the TV flat against the wall. They offer a sleek and low-profile look, making them a great choice if you have a dedicated viewing area with optimal seating positions. However, fixed mounts don’t allow for tilting or swiveling.
- Tilt Mounts: Tilt mounts allow you to adjust the vertical angle of the TV, offering a better viewing experience from different seating positions. These mounts are especially useful if your installation area has varying eye levels.
- Articulating or Full-Motion Mounts: Articulating mounts provide the highest level of flexibility. They allow you to tilt, swivel, and extend the TV from the wall. This is beneficial for installations where the TV needs to be viewed from multiple angles or spaces.
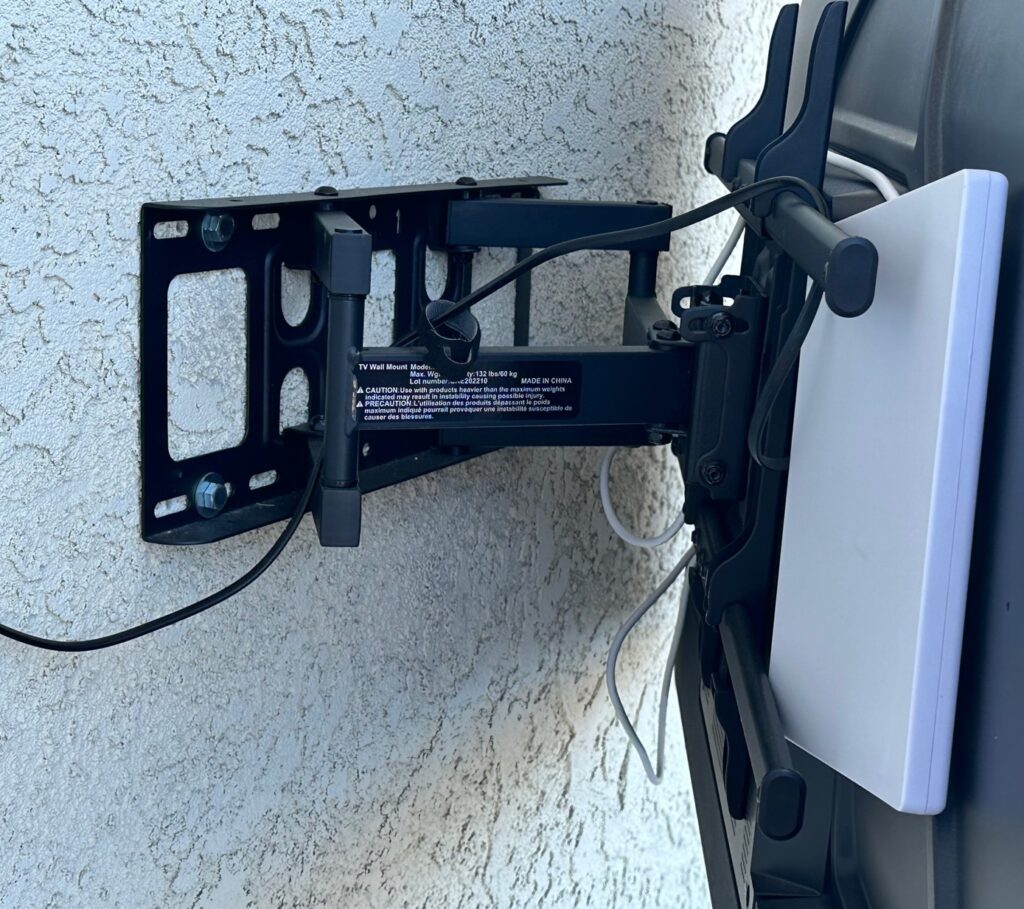
Here is the TV mount I went with:

Considerations for stucco mounting:
When mounting a TV on stucco, consider the following factors when selecting a mount:
- Weight Capacity: Ensure the chosen mount can support the weight of your TV. Outdoor TVs might be slightly heavier due to their weather-resistant construction, so choose a mount with a suitable weight capacity.
- Material and Durability: Opt for a mount made from sturdy and weather-resistant materials, such as coated steel or aluminum. This ensures the mount’s longevity in outdoor environments.
- Compatibility: Check if the mount is compatible with the VESA pattern of your TV. The VESA pattern determines the placement of mounting holes on the back of the TV.
- Ease of Installation: Look for mounts that come with clear installation instructions and hardware suitable for stucco surfaces.
Installation flexibility:
The type of mount you choose should align with your outdoor setup and preferences:
- If you have a fixed viewing area and want a clean and sleek look, a fixed or tilt mount might be suitable.
- If you want the flexibility to adjust the TV’s position for different viewing angles or to avoid glare, consider an articulating mount.
Weatherproof features:
While not directly related to the type of mount, some mounts come with additional weatherproofing features. These features enhance the protection of the TV in outdoor environments. Look for mounts that have weatherproof coatings or built-in covers for added durability.
Ultimately, the choice of TV mount depends on your specific needs and the features you value most. Selecting the right mount ensures that your outdoor TV is securely positioned for optimal viewing pleasure while also considering the unique challenges posed by stucco surfaces.
Gather necessary tools and materials
Equip yourself with the necessary tools and materials to ensure a smooth installation process. Common tools and materials you might need include:
- Pencil or Marker: Handy to mark where to drill.
- Drill and Drill Bits: A power hammer drill is essential for making holes in the stucco to mount the TV bracket securely. The use of a masonry drill bit is recommended.
- Level: A level helps ensure that the TV is mounted straight and aligned properly.
- Stud Finder: A stud finder helps locate wooden studs behind the stucco, which provide solid anchor points for mounting.
- Screws and Anchors: Depending on the TV and mounting bracket, you’ll need screws and anchors suitable for stucco installation.
- Cable Management Accessories: Plan how you’ll manage the cables to maintain a tidy appearance. Cable clips, conduits, and weatherproof cable covers might be necessary.
- Lag bolts or concrete screws: For securing the mount to the wall. Make sure they are the appropriate size for the bracket
- Sockets and Ratchet: Required if using lag bolts to secure mount.
- Wall Anchors (if necessary): May be required depending on the types of bolts or screws used to secure mounting bracket to stucco.
By carefully considering these pre-installation factors and gathering the required tools, you’ll be well-prepared to tackle the installation process confidently. Next, we’ll delve into the crucial safety considerations you should keep in mind as you embark on this project.
Safety considerations
Undertaking an outdoor TV installation on stucco involves various tasks that require careful attention to safety. Prioritize your well-being and the well-being of those around you by adhering to these safety guidelines throughout the installation process:
Electrical safety:
- Power Off: Always ensure the power is turned off before handling any electrical components. This includes both the TV and any power sources you might be working with.
- Qualified Electrician: If you need to extend or modify electrical wiring for the TV, consider consulting a qualified electrician to ensure compliance with local electrical codes and safety standards.
Electrical Safety Warning: Disconnect power sources, consult experts for wiring, and ensure proper insulation to prevent shocks and hazards during outdoor TV installation. Your safety matters most. Please check out the following post for more details on DIY Electrical Safety.
Working at Heights:
- Stable Ladder: When working at heights to mount the TV, use a sturdy and properly positioned ladder. Ensure the ladder is placed on a level surface to prevent tipping.
- Spotter: If possible, have a friend or family member act as a spotter while you’re on the ladder. They can assist in stabilizing the ladder and passing tools.
Personal Protective Equipment (PPE):
- Eye Protection: Wear safety goggles or glasses to protect your eyes from debris and dust while drilling into stucco.
- Gloves: Wear gloves to prevent cuts and abrasions, especially when handling sharp tools or rough materials.
Proper tool usage:
- Read Manuals: Familiarize yourself with the operation of all tools you’ll be using. Follow the manufacturer’s instructions and guidelines.
- Tool Inspections: Regularly inspect your tools for signs of damage or wear. Faulty tools can lead to accidents or poor results.
Weather awareness:
- Weather Conditions: Monitor weather forecasts before starting the installation. Avoid working in adverse weather conditions, such as heavy rain or strong winds, that could compromise your safety.
First aid and emergency preparedness:
- First Aid Kit: Have a well-stocked first aid kit on hand in case of minor injuries.
- Emergency Plan: Inform someone about your project and whereabouts, especially if you’re working alone. In case of an accident, they’ll know where to find you.
Safe material handling:
- Lifting Techniques: If heavy lifting is involved, use proper lifting techniques to avoid strain on your back and muscles.
- Secure Storage: Store tools and materials securely to prevent tripping hazards and to keep them out of reach of children and pets.
Common sense precautions:
- Stay Hydrated: Drink plenty of water to stay hydrated, especially when working in outdoor environments.
- Avoid Distractions: Focus on the task at hand and minimize distractions to prevent accidents.
By taking these safety considerations seriously, you’ll create a secure environment for yourself and those around you during the installation process. Remember, safety is a continuous responsibility, so keep these guidelines in mind at every step of your outdoor TV installation journey.
Instructions for mounting TV outside
- Determine the mounting location: Choose a suitable location on the stucco wall for mounting the TV. Consider factors such as viewing angle, sunlight exposure, and protection from the elements. The location I selected was under an overhang of the second story, close to a power location and on a wall where there was room for the size of the TV I was installing.
- Locate studs: Use a stud finder to locate the wooden studs within the wall. It’s important to mount the TV onto the studs for secure support. Mark the center of each stud with a pencil or marker. I found it difficult to use a stud finder on the stucco wall. My solution was to use it to find studs on the interior of the house and transfer this to the outside. This takes a little bit of effort but if you take your time you should be able to figure out where the studs are located.
- Determine power source for the TV. I did not have an existing outlet in the area I planned to mount the TV but I did have an existing flood light that I never used. I found a dual GFCI outlet adapter that I could use in place of the old flood light to provide a way to power the TV. It also allows the ability to add an exterior light if desired.
- Attach the wall-mount bracket: Position the wall-mount bracket against the stucco wall, aligning it with the marked stud locations. Use a level to ensure it is straight. Mark the mounting holes of the bracket on the stucco using a pencil or marker. I suggest getting a wall-mount that is adjustable so you can move and turn the TV as needed, especially if you get a lot of sun.
- Pre-drill pilot holes: Use an electric drill (preferably a hammer drill) with a masonry drill bit to pre-drill pilot holes at the marked locations on the stucco wall. Make sure the drill bit is appropriate for the size of the mounting hardware.
- Install anchors (if necessary): If the pilot holes do not align with studs or if you’re unable to mount the bracket directly onto a stud, you may need to install anchors. Follow the manufacturer’s instructions to install the anchors securely.
- Secure the bracket: Place the wall-mount bracket back on the wall, aligning the mounting holes with the pre-drilled holes or anchors. Insert the lag bolts or concrete screws through the bracket and into the pre-drilled holes. Tighten the bolts or screws using a screwdriver or screw gun. Ensure the bracket is securely fastened to the stucco wall. My mounting bracket came with 4 lag bolts, but I ended up adding a couple more just to make sure I really had the bracket securely mounted to the wall.
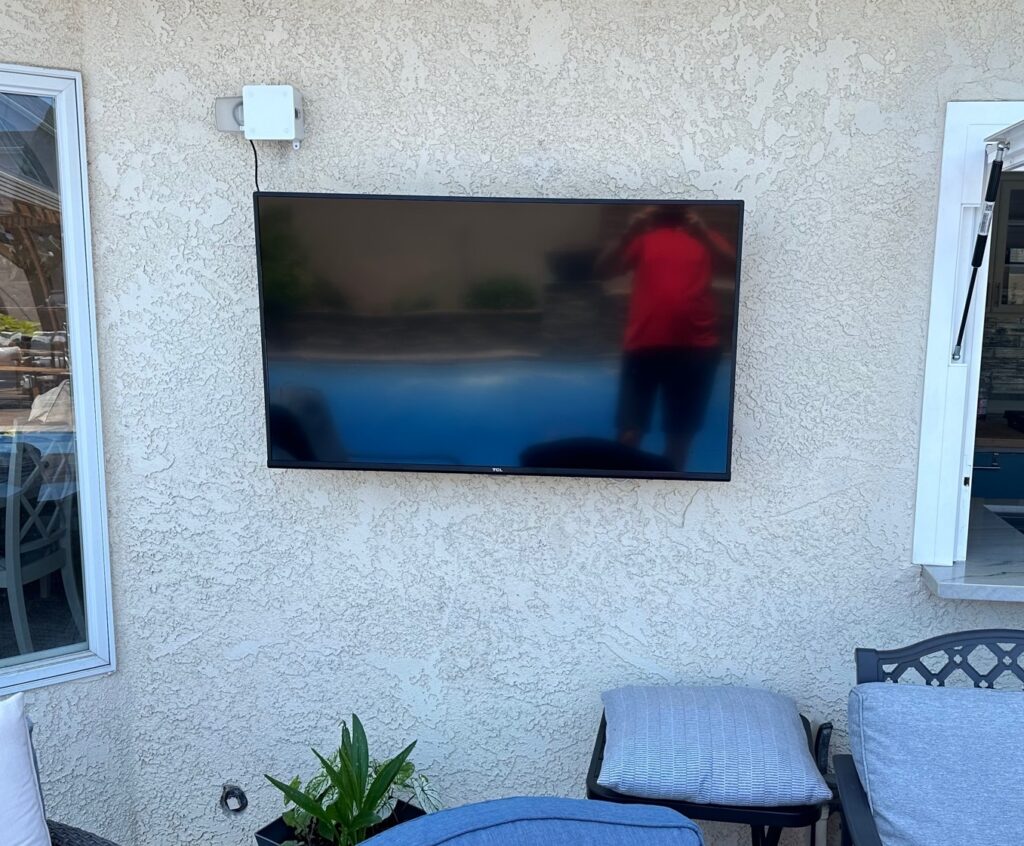
- Attach the TV: Follow the instructions provided with your TV and the wall-mount bracket to attach the TV to the bracket securely. This typically involves using the appropriate screws provided with the wall-mount bracket. It is helpful to get a family member or friend to help with this process. Flat screen TVs are pretty light but it makes it a lot easier with 2 or more people.
- Check the stability: Once the TV is mounted, check its stability by gently pushing on it from different directions. Ensure that it is securely fastened and doesn’t wobble or shift.
Weatherproofing and protection
One of the most critical aspects of outdoor TV installation is ensuring that your investment remains safe and functional despite the challenges posed by the elements. Weatherproofing and protection measures play a crucial role in extending the lifespan of your outdoor TV and maintaining its performance. Here’s how you can safeguard your TV against the unpredictable outdoor conditions:
1. TV covers:
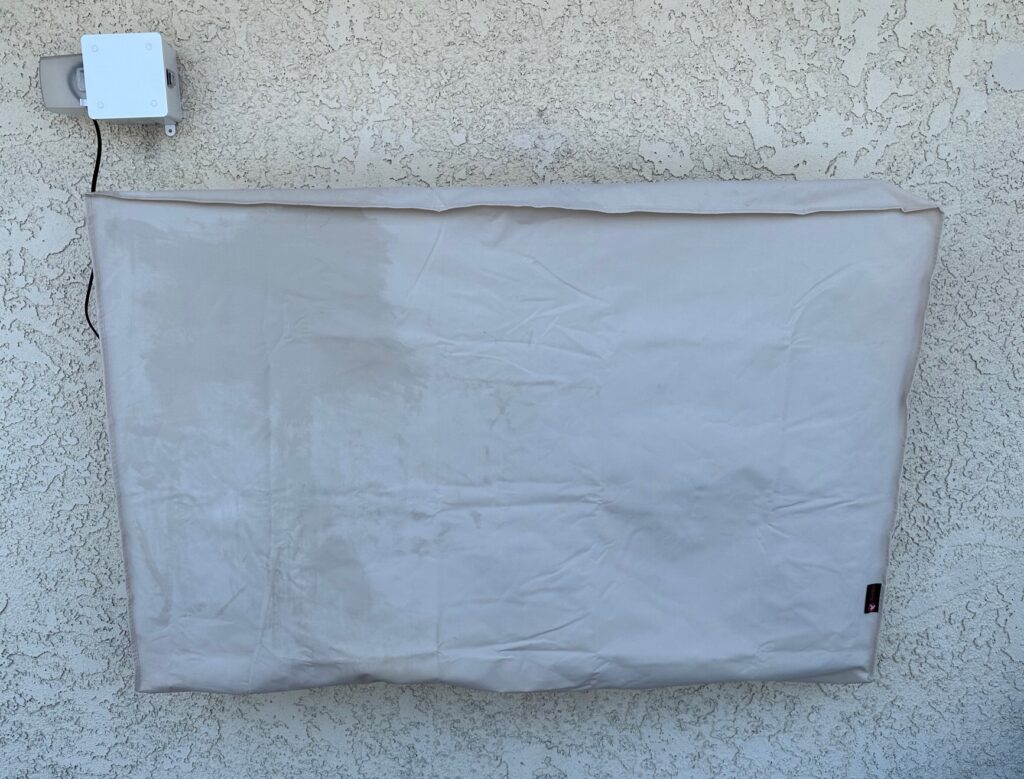
Weather-resistant TV covers are a cost-effective solution to shield your outdoor TV from rain, dust, and harsh sunlight. These covers are designed to fit over the TV and provide a protective barrier when the TV is not in use. Look for covers made from durable, UV-resistant materials that can withstand exposure to sunlight without fading or deteriorating.
Here is the TV cover I selected: iBirdie Outdoor Waterproof TV Cover

2. Outdoor TV enclosures:
For added protection, consider using outdoor TV enclosures. These enclosures provide a complete shield around the TV, guarding it against rain, snow, wind, and other weather elements. Ensure that the enclosure is specifically designed for your TV’s size and model, allowing for proper ventilation to prevent overheating.
3. Cable management:
Effective cable management not only enhances the aesthetics of your outdoor TV setup but also protects the cables from the effects of weather. Use weatherproof cable covers, clips, and conduits to keep cables organized and shielded from rain, sunlight, and critters that might be tempted to chew through them.
4. Choose the right location:
While not directly related to external protection, choosing the right installation location can significantly impact your TV’s longevity. Avoid areas where the TV is directly exposed to sunlight for extended periods, as this can lead to screen degradation over time. Similarly, position the TV in a way that minimizes exposure to rain and wind-driven debris.
5. Regular cleaning and inspection:
Schedule regular cleaning and maintenance sessions to keep your outdoor TV in top condition. Remove dust, dirt, and debris from the TV’s surface, vents, and inputs. Inspect the TV cover, enclosure, and cables for any signs of wear or damage and address issues promptly to prevent further deterioration.
6. Seasonal protection:
Consider seasonal protection measures, especially if you live in an area with harsh winters or intense summer heat. During colder months, remove the TV and store it indoors to protect it from freezing temperatures. In the summer, ensure that the TV has proper ventilation and shading to prevent overheating.
7. Manufacturer recommendations:
Always refer to the manufacturer’s recommendations for weatherproofing and maintenance. Different outdoor TV models may have specific guidelines to ensure optimal performance and protection.
By incorporating these weatherproofing and protection measures, you can enjoy your outdoor TV setup with confidence, knowing that your investment is safeguarded against the elements. Proper care and attention to detail will allow you to make the most of your outdoor entertainment space for years to come.
Conclusion
Transforming your outdoor space into a captivating entertainment oasis through the installation of a TV on stucco is an exciting endeavor that brings a new dimension to your outdoor living experience. As you’ve discovered in this guide, the process involves careful planning, meticulous execution, and a keen focus on safety and protection.
From the initial considerations of weather exposure and viewing angles to the selection of the right TV mount and implementing weatherproofing measures, every step plays a pivotal role in the success of your outdoor TV installation. By following the guidelines outlined in this blog post, you’ve equipped yourself with the knowledge and confidence needed to create a visually stunning and functional outdoor entertainment area that will be the envy of your friends and family.
As you enjoy movie nights under the stars, cheer on your favorite sports teams, or host gatherings with loved ones, remember the effort you’ve invested in securing your outdoor TV for the long haul. Regular maintenance, protection against the elements, and responsible usage will ensure that your outdoor TV setup continues to shine, providing countless hours of enjoyment for years to come.
So, with your stucco-mounted outdoor TV in place, let the good times roll, and embrace the magic of seamless indoor-outdoor entertainment like never before. Your outdoor space has now become a place where cherished memories are made and shared, all under the open sky.
Thank you for joining us on this journey to master the art of outdoor TV installation on stucco. Here’s to many joyful moments ahead as you savor the best of both worlds — the great outdoors and the captivating world of entertainment.


Leave a Reply