

Replacing the fan clutch on a motorhome can seem daunting, but with the right tools and guidance, it’s a manageable task that can save you time and money. In this blog post, we’ll walk you through the process of replacing the Ford F53 fan clutch on your motorhome chassis. The fan clutch plays a crucial role in regulating your engine’s temperature, ensuring optimal performance and preventing overheating. Whether you’re a seasoned DIY enthusiast or a beginner looking to tackle your first major repair, this guide will provide you with the step-by-step instructions and tips you need to get the job done efficiently.
Ford F53 Fan Clutch Replacement Procedure
Replacement Part
I went ahead and purchased an authentic part from a Ford parts dealer. You can find non-Ford replacements that are cheaper, but I had seen others have problems with these cheaper parts. Seeing as this is an important part of your RV, I wanted to go with a good quality part.
The part I ordered was part number LC3Z-8A616-B, which is for years 2020-2022. This part was going in my 2021 Jayco Precept 34G that has the 2020 Ford F53 Chassis.
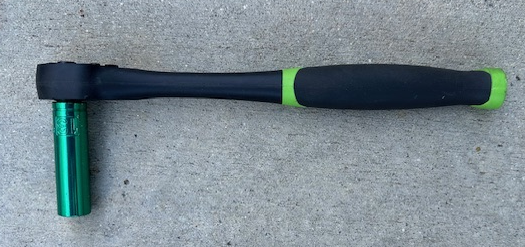
Tools Required
- 10 mm Socket
- 13 mm Deep Socket
- Ratchet
- T27 Torx Bit
- Right Angle Screwdriver
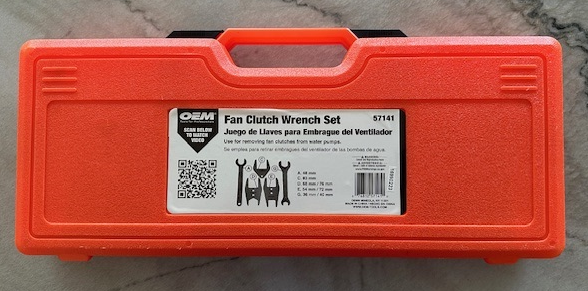
- Fan Clutch Removal Took Kit
- Safety Gear
- String and Magnets (optional)
Steps for Replacing Ford F53 Fan Clutch
In the following steps, we will guide you through the process of replacing the Ford F53 fan clutch on your motorhome chassis. This procedure focuses on removing the fan clutch from below without the need to remove the fan shroud. By following these instructions, you can efficiently and safely complete the replacement, ensuring your motorhome’s engine remains cool and operates smoothly. Let’s get started!
Step 1 – Disconnect the Battery
Always start by disconnecting the battery to ensure safety.
Step 2 – Disconnect Fan from the Fan Clutch
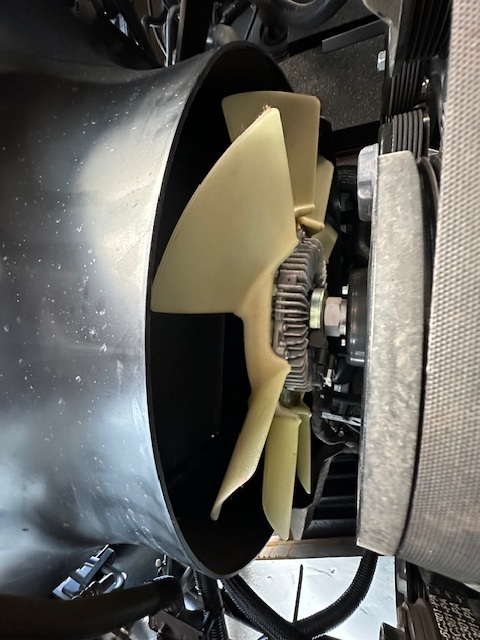
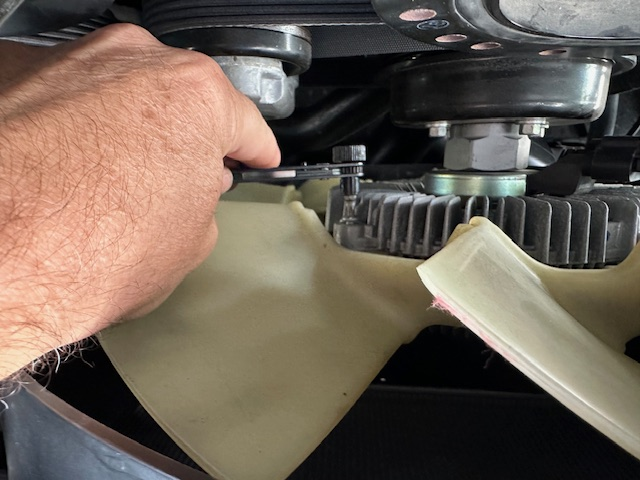
In order to remove the fan clutch from below without removing the fan shroud you will need to remove the fan from the fan clutch and just set it back out of the way within the fan shroud.
This is where you need to use the T27 Torx bit with the right angle screwdriver tool. You don’t have a lot of room to work with, so you will need a way to get in there and that is where the right angle screwdriver came in handy. I purchased this tool from Harbor Freight for $2.99 and it worked great.
There are four bolts securing the fan to the Ford F53 fan clutch. You just need to loosen them so that you can remove the nut on the other side. Be careful to not strip the bolt. Also be careful to not lose the nuts. If they fall back inside the fan clutch, don’t worry, I had this happen and using some string and magnets I was able to retrieve them.
You can rotate the fan clutch to get at all four bolts for removal.
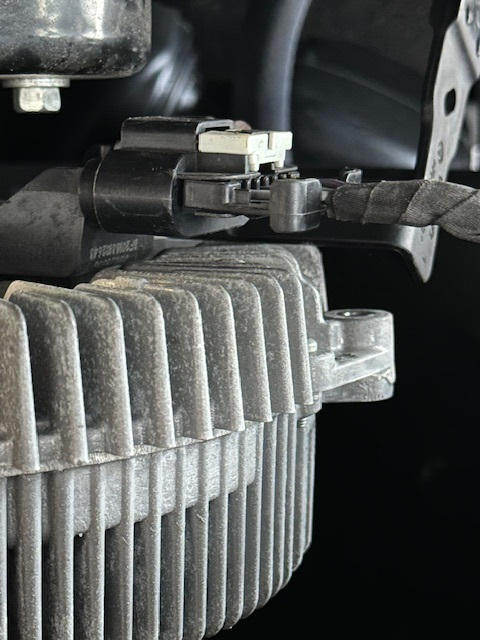
Step 3 – Disconnect Wire Harness from Fan Clutch
There will be a wire harness with a connector that connects to the fan clutch. You will need to remove this. Make sure you take your time and do not try and force anything as you do not want to damage the connector or any of the wires.
Step 4 – Disconnect Fan Clutch Arm
There will be a plastic arm that is attached to the chassis/engine. This is done with a 13 mm nut on a long bolt. This is where the 13 mm deep socket comes in handy. I found it difficult to remove this from underneath as there were other parts in the way making it impossible to use a ratchet with the socket from this angle.
The best bet is to try and do this from the front passenger side wheel well. I was able to lean against the top of the tire and get underneath and reach in and fit the socket on the nut and remove it. There wasn’t a lot of room so it may not work for everyone with the tire in place. If you still can’t reach it from this angle you may need to remove the tire.
Step 5 – Remove the Nut Holding Fan Clutch in Place
Now it is time to loosen the nut holding the fan clutch in place. I initially attempted this with just a large wrench but it started to move the water pump. Some people had success with a wrench and strap wrench, but this didn’t work for me. This is where the fan clutch removal tool kit was required. I do not own this tool, but I was able to loan this tool from AutoZone with just a deposit. The tool I borrowed wasn’t an exact fit, but I still managed to make it work.
You first need to figure out which way you will need to loosen the nut. I examined the new replacement Ford F53 fan clutch and discovered that it is threaded in the opposite direction than normal bolts. This means that from underneath you will need to turn the wrench towards the passenger side of the RV.
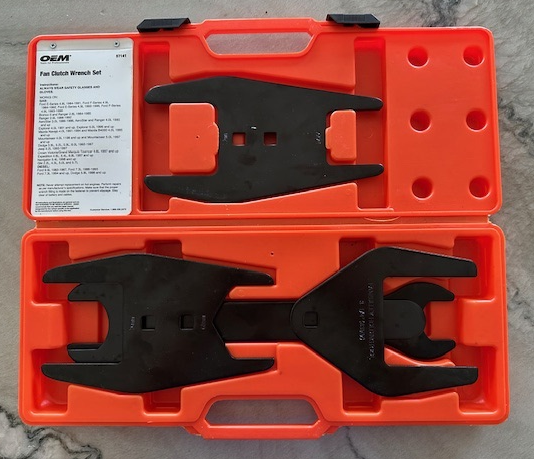
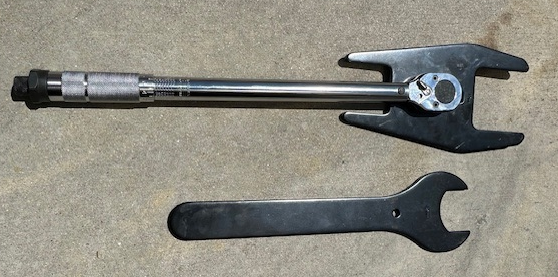
The removal tool kit came with a bunch of different parts to cover a wide variety of vehicles. The fan clutch wrench that fit the nut perfectly was the one labeled 45 mm. The other part I needed was the one to hold the water pump in place. This fits over the bolts on the water pump to keep it from moving. The closet one I found was the 72 mm one. It didn’t fit exact but was close enough to keep the water pump from moving. In order to use this part, you need to attach it to a breaker bar with 1/2 inch drive. I didn’t have a breaker bar, but I did have a torque wrench that worked and I just set it to the setting where it wouldn’t move when I used the wrench to try and loosen the nut.
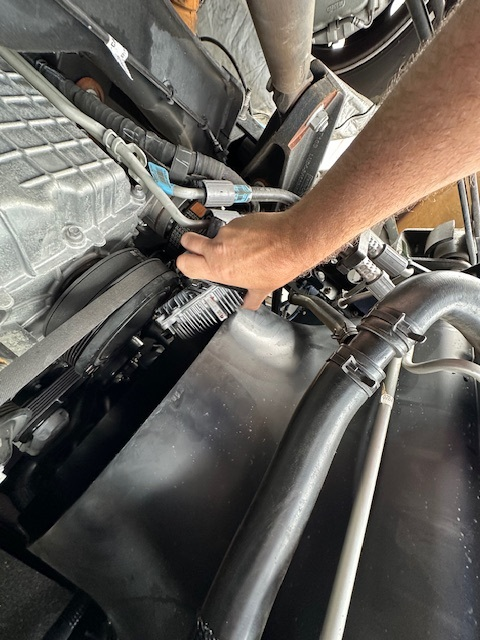
In order to use both tools, I found it easier to get someone to help. I grabbed my son and had him use the tool to keep the water pump in place as I attempted to loosen the nut. This worked out extremely well and didn’t require as much force as I thought I may need.
Loosen the nut all the way and be careful as you get close to the end. Once you have the fan clutch separated, gradually set it down inside the fan shroud.
Step 6 – Pull Fan Clutch out from Fan Shroud
You now need to get the Ford F53 fan clutch out from inside the RV engine. To do this I tried a few different ways that didn’t work. I finally realized that if you try on the side towards the passenger side that you can actually get it out from inside the fan shroud and the rest of the engine. At this point you are done removing the old fan clutch.
Step 7 – Attach New Fan Clutch
You will want to put the new Ford F53 fan clutch inside engine and rest it inside the fan shroud. Follow the steps you just performed to remove the old fan clutch, just in reverse.
Once you have the fan clutch inside the fan shroud, the next step is to attach the nut to the water pump. I attempted to do this on my own, but it was a challenge to hold the heavy fan clutch in place as I tried to get the nut connected. I found it easier to have someone help here, so I again grabbed my son. Once you get the nut started you will want to rotate all the way tight. You can then use the fan clutch removal tool to make sure it is tight, but you don’t want to really force it tight.
Step 8 – Attach Plastic Arm with Nut
You will want to move the plastic arm into place over the bolt you had removed it from previously. Once the plastic arm is in place you will need to use the 13 mm deep socket to tighten the nut. I did this from leaning over the passenger side tire.
Step 9 – Reconnect the Wire Harness to Fan Clutch
You will want to reconnect the wire harness to the connector on the new fan clutch. the wire harness may have a push connector that you can use to attach to the plastic arm. You will want to make sure this is reattached.
Step 10 – Reattach the Fan to the Fan Clutch
You will need to attach the fan to the fan clutch with the four bolts that are already in the new fan clutch. This is where you will use the nuts you previously removed. A 10 mm standard socket will work for these. This step is pretty challenging as it is pretty difficult to hold the nut in place as you attempt to tighten the bolt. What makes things even more difficult, at least for 2 of the bolts is that there is an extra fan fin in the area making it even tighter to reach in to hold the nut in place. I tried different socket extenders and universal joint socket adapters without much luck.
The best I could do was to first loosen the bolt from the fan clutch so that it did not extend out the back. Move the nut into place and tighten the bolt and hold the nut as best you can. I did this for all 4 nuts, but the fan was still a little loose. I then went back and backed out the bolt a little bit and this pulled the nut closer to the fan clutch and ended up making the fan pretty secure.
Step 11 – Reattach the Battery
You are basically all done. Now it is time to reattach the battery!
Conclusion
Replacing the Ford F53 fan clutch on your motorhome chassis may seem challenging, but with the right tools and a clear step-by-step guide, it can be done efficiently without removing the fan shroud. By following this procedure, you ensure that your engine stays cool and runs at optimal performance, preventing potential overheating issues. Regular maintenance like this not only extends the life of your motorhome but also gives you the confidence to tackle other DIY projects. Remember, safety first, take your time, and enjoy the satisfaction of a job well done. Safe travels!


Leave a Reply