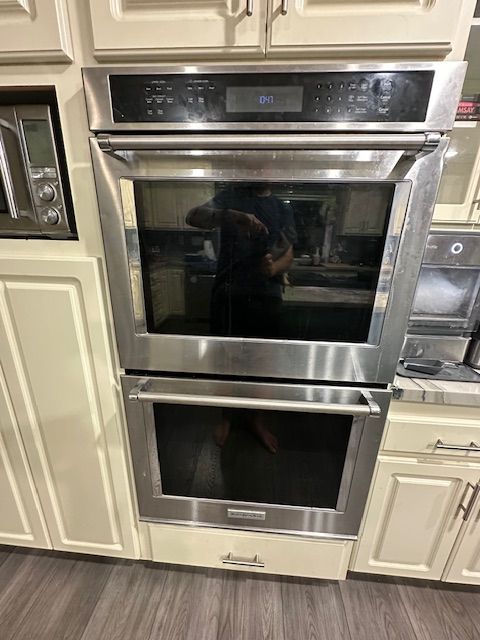
Is your KitchenAid KODE300ESS oven repeatedly blowing its thermal fuse? It’s a frustrating problem I know all too well. I replaced the fuse on my oven, only to have it blow again a little over a year later. After some troubleshooting, I discovered the thermal fuse wasn’t the root cause—it was just a symptom of a much larger issue. The real culprit was a failing KODE300ESS cooling fan.
When the cooling fan stops working correctly, the oven can’t dissipate heat properly, leading to the thermal fuse blowing to protect the circuit. Once I diagnosed the real problem, replacing the fan was a straightforward fix that has kept my oven running perfectly ever since.
In this guide, I’ll show you exactly how to diagnose if your cooling fan is the problem and provide a step-by-step walkthrough for replacing the KODE300ESS cooling fan yourself. Let’s get your oven working properly and stop that thermal fuse from blowing for good.
Important First Step: Check Your Thermal Fuse
If your oven has stopped working entirely, the first thing you need to do is check the thermal fuse. The KODE300ESS will not power up if the fuse is blown, meaning you won’t be able to access the control panel or enter the diagnostic menu.
If your oven is completely dead, your first repair will be to replace the thermal fuse. I have a separate, detailed guide on how to do this here: KitchenAid KODE300ESS Thermal Fuse Replacement.
Once you have replaced the fuse and restored power to the oven, you can then proceed with the steps below to diagnose whether a faulty cooling fan was the root cause of the problem. This will help you avoid the frustration of replacing the fuse only to have it blow again a few months later.
Diagnosing the Problem
Before you order any parts, you need to confirm that the cooling fan is actually the problem. The most reliable way to do this is by using the oven’s built-in diagnostic mode. This special mode lets you test individual components to see if they are working correctly.
Step-by-step to enter diagnostic mode:
- Plug in the oven or turn the breaker on to restore power.
- Press the CANCEL button twice, followed by the START button. You must do this within five seconds.
Below are photos of the left and right side of the KODE300ES display showing the buttons. On the right side you will find the Start and Cancel buttons used to enter diagnostics mode. On the left side you will find the Cook Time button for both the upper oven and lower oven you use to turn on the KODE300ES cooling fan.
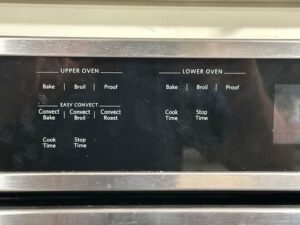
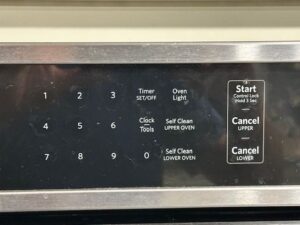
If you entered the diagnostic mode correctly, the display will change and show a new menu.
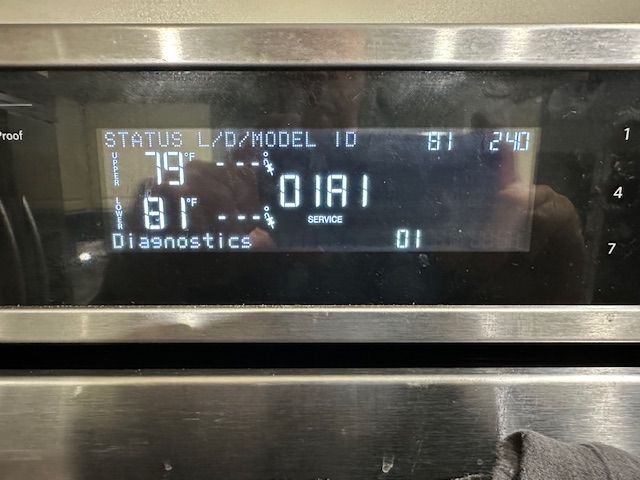
From here, you can select the test for the cooling fan. To test the blower fan, you can initiate the test by pressing the Cook Time button. Press once to enter low speed and again to go to high speed. Press again to turn off.
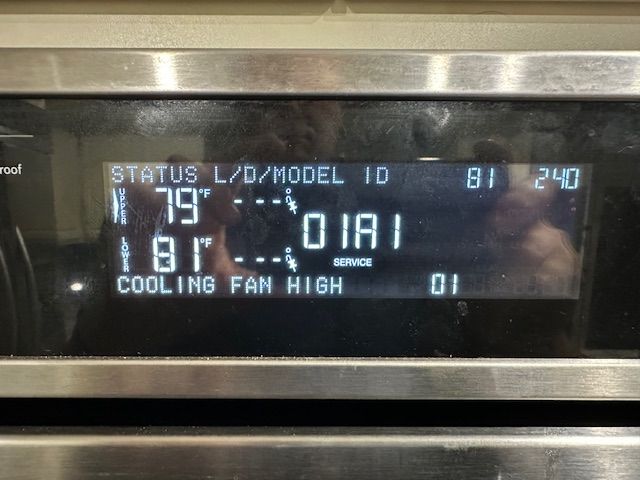
Once you initiate the test, pay close attention to the fan’s behavior. A working fan should spin freely and quickly. Seeing as my oven was a double oven I could test both blower fans and compare how they sound and the amount of air they were pushing out of the oven. My upper blower fan definitely did not sound or have the same output as the lower blower fan. This simple test confirmed that the old upper blower fan was faulty.
This diagnostic check is crucial. It saves you from replacing the thermal fuse again and again, and it gives you the confidence to know you’re fixing the right problem.
Gathering Your Supplies
Before you begin the repair, it’s important to have all your parts and tools ready to go. You want to avoid having your oven in pieces on the floor while you’re scrambling to find a screwdriver.
Parts You’ll Need:
- Replacement KODE300ESS Cooling Fan: This is the most crucial component. Make sure you get the exact part number for your model.
- New Thermal Fuse: While you’re at it, it’s a good idea to have a new thermal fuse on hand. If your fan has failed, the fuse has likely blown to protect the circuit. It’s best to replace both to ensure the repair is complete.
Tools You’ll Need:
- Screwdriver or Nut Driver: You’ll need this to remove the back panel and the fan assembly. Check the screws on your oven to see if you’ll need a Phillips head screwdriver or a nut driver. I needed to use a 1/4″ nut driver.
- Cardboard and Scrap 2×4 Boards: These are essential for protecting both your floor and the front of your oven from scratches or damage when you lower it to the ground.
- A Helper: The KODE300ESS oven is heavy. This is not a one-person job. Having a second person to help you lift and lower the oven safely is critical.
Step-by-Step Replacement
Now that you have your supplies and have diagnosed the problem, it’s time to get to work. Remember to keep safety first and to have your helper ready.
Step 1: Disconnect Power
Turn off the circuit breaker for the oven.
Warning: This is a very important step for safety. Do not skip this step!
Step 2: Prepare Oven for Removal
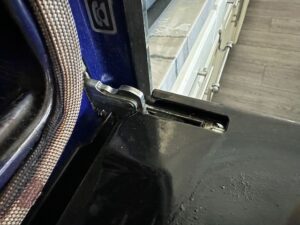
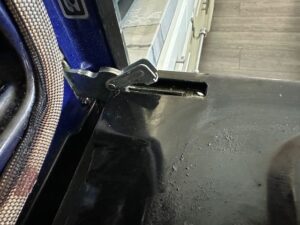
Remove the Oven Doors: This will significantly lighten the oven and make it much easier to handle. Consult your oven’s manual for the specific instructions on how to properly unlock and remove the doors. They are usually designed to be removable for cleaning and servicing.
For the KODE300ESS oven, on the door hinge there is a level that you need to flip open. Once this is done on each side, you can close the oven slightly and left up and the door should just come off. Repeat this for each door on your oven. Set the oven doors down on a blanket, rug, or piece of cardboard.
Remove the Racks: Take out all the interior oven racks and set them aside.
Unsecure the Oven: The oven is typically secured to the kitchen cabinet by a few screws, often located in the trim around the front of the unit or inside the door frame. Locate and remove these screws.
Step 3: Remove the Oven
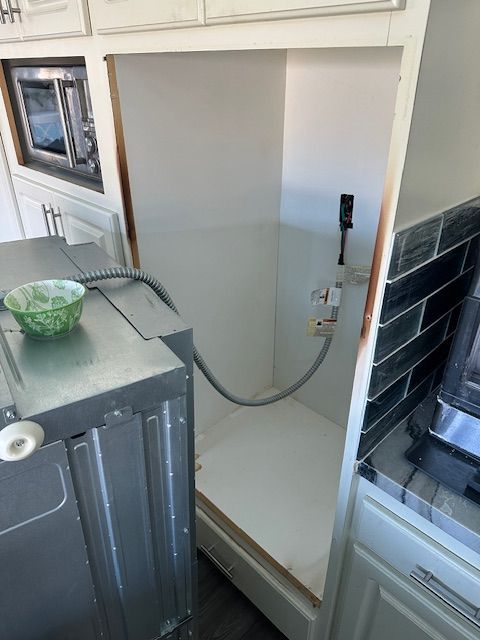
With your helper, carefully pull the oven out of the cabinet. We placed our oven on the floor on top of a large piece of cardboard and two 2×4 boards to protect both the floor and the front stainless steel trim of the oven.
Depending on your installation, you may need to unplug or disconnect the power wires in order to fully remove the oven to get access to the back. Hopefully you are lucky like I was and had plenty of slack in the wires to avoid having to disconnect.
Step 4: Access the Fan
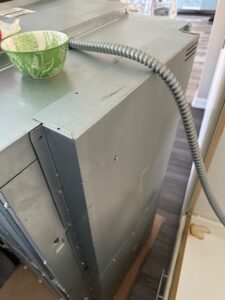
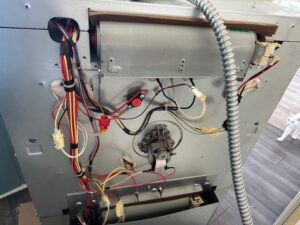
With the oven on the floor, remove the back access panel. This will expose the internal components. You’ll be able to see the wiring, control boards, and, most importantly, the KODE300ESS cooling fan.
The KODE300ESS oven’s back panel required a 1/4″ nut driver to remove the screws.
DIY Pro Tip: Use a small bowl to place all the screws you remove from the back panel.
Step 5: Remove the Old Fan
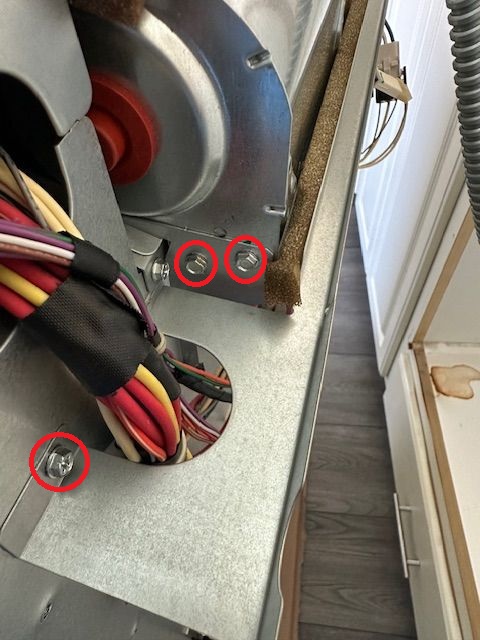
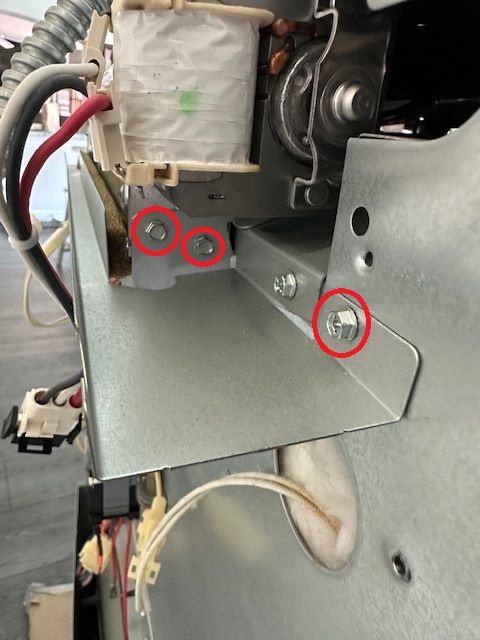
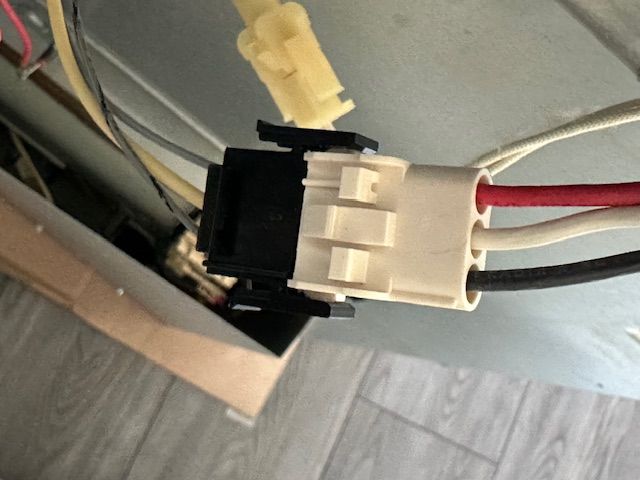
Disconnect the wire harness from the fan. Then, unscrew the fan assembly from the oven’s frame. Take note of how it’s oriented so you can install the new one the same way. The old fan should now be completely free. This is a good time to compare the old and new fans. You can spin the fan blades with your hand to feel the difference. The old one felt stiff and barely moved, while the new one spun freely and smoothly.
The below photos show the 3 screws (circled in red) you need to remove on each side of the bracket that holds the KODE300ESS cooling fan in place.
DIY Pro Tip: I was able to test both fans before putting the oven fully back together. You can find a location to place the blower motor and connect it to the wiring harness and then turn on power and use the diagnostic mode to turn them on and watch them spin. You need to be very careful with this step as there are exposed wires and moving parts. I was able to see a big difference which helped give me confidence this repair was going to solve the issue.
Step 6: Install the New Fan
Place the new fan in the same location and position as the old one. Secure it with the screws you removed and reconnect the wire harness.
Step 7: Reassemble and Test
Screw the back access panel back into place. With your helper, carefully lift the oven and slide it back into its cabinet. Restore power by flipping the circuit breaker back on. To test your work, turn on a function like convection bake. You should hear the fan turn on and run smoothly. If all goes well, you have successfully replaced your KODE300ESS cooling fan and solved the recurring thermal fuse issue for good.
Conclusion
And that’s it! By taking the time to properly diagnose the problem, you’ve not only replaced a faulty part but also fixed the root cause of the recurring thermal fuse issue. No more repeated repair calls or frustrating oven failures.
This repair demonstrates that often, a seemingly complicated problem has a straightforward solution once you identify the real culprit. Our oven has been working perfectly ever since replacing, and the peace of mind is well worth the effort.





Leave a Reply