

This article will go over how I went about repairing my KitchenAid KSSC48QMS beeping issue that recently started to behave strangely. The display panel inside the fridge section would beep and the display would flash and turn off. This all started happening after power was restored to the house after it had been shut off for a period of time.
Issue with my KitchenAid KSSC48QMS Refrigerator
My refrigerator started acting very strange. If you looked at the display inside the fridge you would see the numbers flashing and you would also hear beeping. It started off doing this occasionally and you could power off the fridge and turn it back on and the issue would seem to go away but would then come back. Eventually it got much worse and would constantly flash the display and beep. While this was happening the temperature inside the fridge and freezer still maintained a cold temperature.
Here is a video I took of the issue just before I moved forward with the repair:
Researching the Issue
My first step was to hit the internet to see what I could find out regarding others that had similar issues. I ended up finding a lot of information that pointed at a faulty control board. Unfortunately, these boards are no longer available. There were a number of services where you could send in your board to get repaired and they even offered options to ship you an advance replacement and then you could swap out your bad board and return this. These were all in the $200+ – $300+ range. I found a couple of options on eBay where they offered a similar service but I was a little skeptical on this option.
I did come across a post that referenced a blog by Steve Jenkins on what looked like a fix to a similar issue. Using the information on his blog I went ahead and looked for a G5Q-14-EU12DC relay and a Panasonic EEU-EB1J221 capacitor. I ended up finding the following package that was available on Amazon with next day delivery (OMRON (G5Q-14-EU 12DC & EEU-EB1J221) Power Relay, SPDT, 12VDC, SPDT 12VDC ClassF High-Capacity, Sealed, 220µF, 65V, Capacitor). I probably could have sourced the parts for less through DigiKey or Mouser Electronics, but I liked the convivence of order through Amazon and for $10.50 this was much cheaper than my other alternatives.
Preparing for the Repair
After I received the parts and before I started with the repair, I ended up watching the following video that demonstrated the steps required for removing the control board from the refrigerator so that you could perform the repair.
Tools Required
The following are the tools that I used:
- Work light and/or flashlight
- 1/4 in. socket to remove screws
- Socket wrench
- Offset screwdriver – used to remove screws holding control board enclosure to fridge
- Flathead screwdriver
- Needle nose pliers
- Small pliers
- Soldering iron
- Fume extractor
- Magnifying glass
- Snipping pliers
Repairing KitchenAid KSSC48QMS Beeping
The first step is remove power from your fridge. My fridge is a built in and it is hard to access the plug at the outlet so I went outside to my breaker box and turned off the breaker for my refrigerator.
CAUTION: Make sure there is no power to the refrigerator while you are working on this as this could result in serious injuries or even death. Please refer to the DIY Electrical Safety post for more safety tips.
The next step is to remove the control board from the fridge. I followed the video from above.
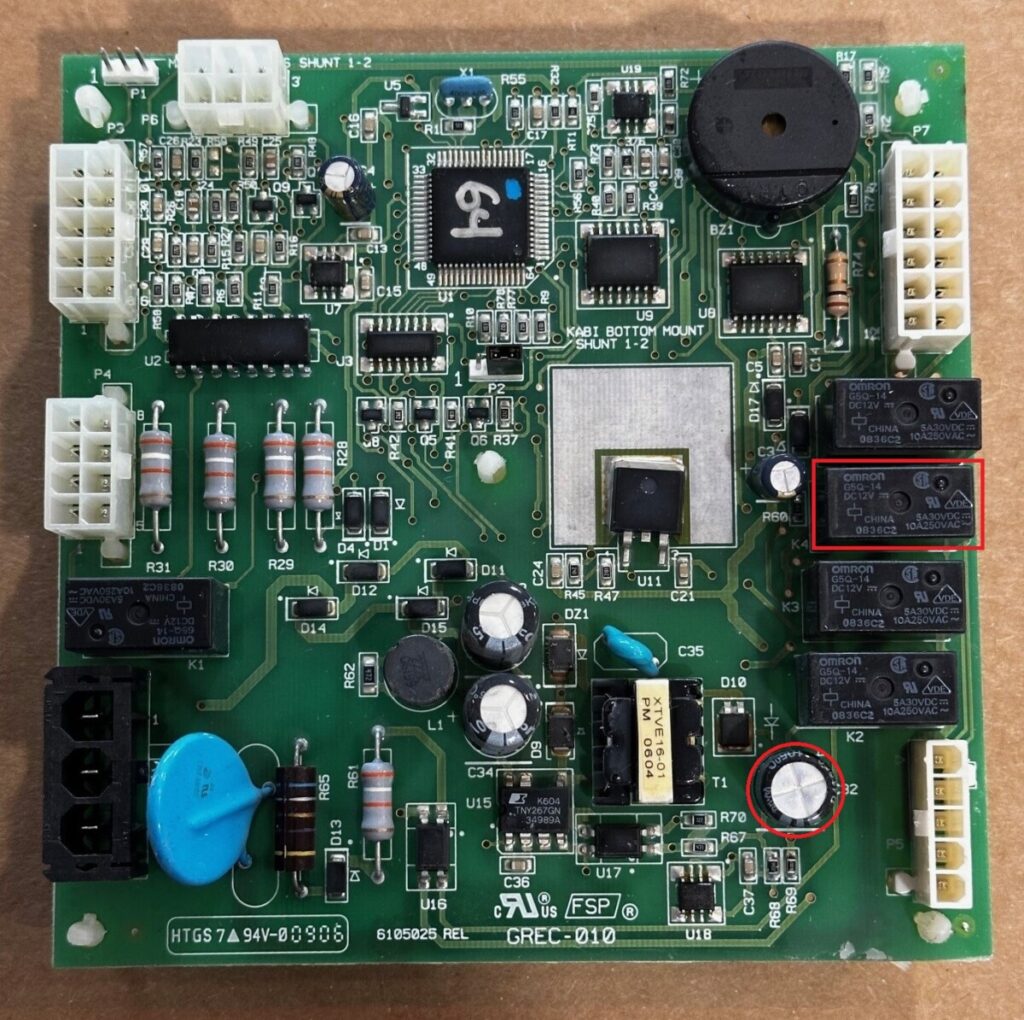
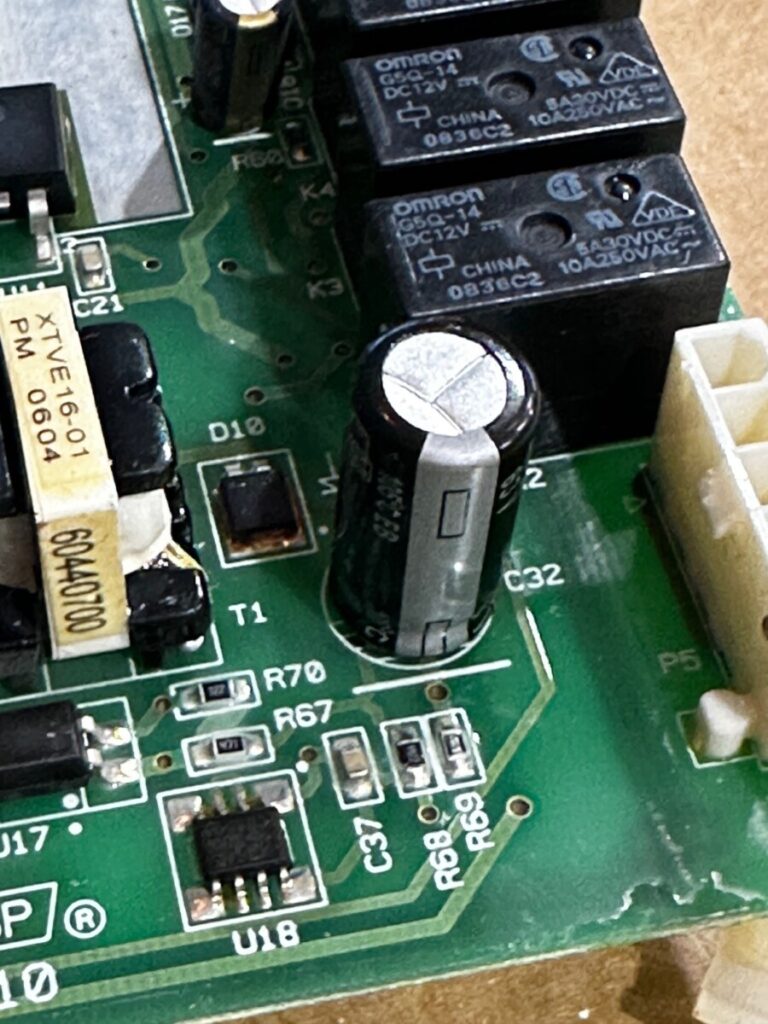
Once you have the control board out, the next step is to remove and replace the capacitor and relay. In the photo below of the control board, the relay to be removed is highlighted in the red rectangle and the capacitor is highlighted in the red circle.
Replacing Capacitor
You will need to desolder the two solder points on the back of the control board PCB. Note the orientation of the installed capacitor so that you install the new one with the same orientation. Using a solder iron you will heat up the solder joint and look to remove the solder that is there. I was able to use the solder iron to touch and heat both joints and then I had someone help be remove the capacitor.
To install the new capacitor (EEU-EB1J221), I again heated up both joints and then worked on pushing the capacitor wires through the holes in the circuit board. I then clipped off the excess wire that extended through the circuit board.
Replacing Relay
I couldn’t use the same trick with the relay as I did the capacitor as there were 5 solder joints and it wasn’t possible to heat all of them at the same time with just the soldering iron. For these I needed to remove as much of the solder as possible. I initially tried desoldering wick, but this wasn’t working for me. I ended up using some extra stranded wire I had on hand with some flux and this worked out well to remove the existing solder.
Once I removed as much solder as possible I then would wiggle the relay and as needed used the soldering iron to heat up the joints until I was able to remove the relay from the board.
To install the new relay, I inserted the pins through the 5 holes and then used the soldering iron to add solder and secure the relay to the PCB.
Reassembly
Once the new components were installed on the control board and you allowed a few minutes for everything to cool down, it is now time to put everything pack together and give it a try.
You first need to put the control board back into the enclosure and connect up all the connectors to the board. Then you move the enclosure into place and secure it with the two screws and then attach the ground wire to the frame with the third screw.
Next you will need to connect up the 6 other wire connectors. Note I ended up having one extra one and this confused me at first. I then watched the video on how to remove the control panel board and at the start I noticed that there was one extra connector that wasn’t connected to anything and this matched the extra one I came across.
I then put back the panel that enclosed all the fridge components and now it was time to apply power.
Summary
Overall I am super excited at this repair as it ended up solving my issue so far and it only cost me just over $10 and a couple of hours of work.


Leave a Reply