

Welcome to my troubleshooting guide for the KitchenAid KODE300ESS Oven Display. A malfunctioning oven display can be a frustrating issue, but fear not – I will share the steps I took to address my issue. In this blog, I’ll delve into the heart of the matter: the thermal fuse. Understanding what a thermal fuse is and how it plays a crucial role in your oven’s safety is the first step towards resolving display issues. Join me as I guide you through the process of identifying signs of a faulty thermal fuse, the tools you’ll need for a replacement, and a step-by-step walkthrough to get your KitchenAid oven back in top-notch condition. Let’s dive in and bring clarity to the world of oven troubleshooting.
KODE300ESS Oven Display Issue
I discovered the issue with my oven when I was in the kitchen and went to check the time and realized that the clock was off. It was late and I would need to wait until the next day before troubleshooting the issue with my KitchenAid double wall oven.
The next day I did check the main circuit box to see if a breaker had tripped and none had. I did try turning the oven breaker off and back on to see if that would work but no luck. The following steps are what I performed in order to get my oven back up and running.
CAUTION: Make sure there is no power to the oven while you are working on this repair as this could result in serious injuries or even death. Refer to the DIY Electrical Safety post for more information.
Required Tools
To replace the thermal fuse in your KitchenAid KODE300ESS oven, you’ll need a few essential tools. Here’s a list of the required tools:
- Multimeter: For testing electrical continuity and voltage.
- Screwdriver Set: To remove screws and access panels.
- Needle-Nose Pliers: Useful for handling small components and wires.
- Wire Strippers: If you need to strip or cut wires during the replacement process.
- Work Gloves: To protect your hands during disassembly and assembly.
- Safety Glasses: To safeguard your eyes from any debris or particles.
- Flashlight: Provides additional visibility in dimly lit areas.
- Replacement Thermal Fuse: Make sure you have the correct thermal fuse for your specific oven model. The one that I purchased was: W10545291 for Whirlpool Thermal Fuse WPW10545291 AP6022803 W10436435

Removing Oven Front Panel
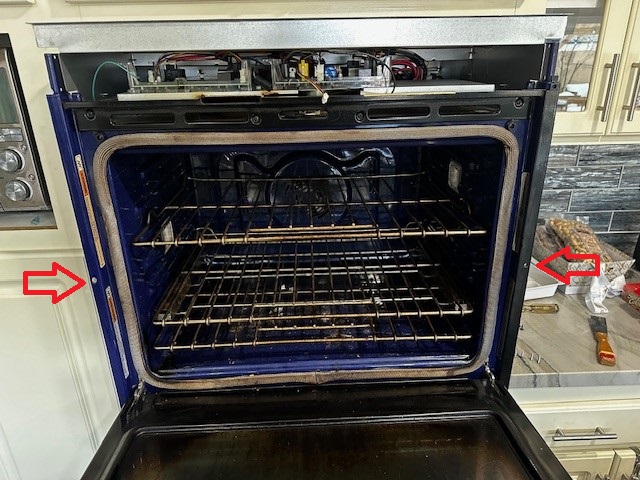
In order to get at the screws holding the front panel on to the oven you first need to remove 4 screws to be able to slide the oven out from the cabinets a few inches. There are two screws behind each oven door. You will need to open each oven door and remove the screw on the left and right side. The below image shows the location of the two screws (red arrows) for the top door. The location for the screws on the lower door are very similar. Note this photo was taken after I already removed the front panel.
Once you have removed the 4 screws it is time to slide the oven out a few inches away from the wall/cabinets. It is best if you have someone to help you, but I was able to do so on my own. Just don’t pull too hard and pull it all the way out as this could be dangerous and could even hurt you.
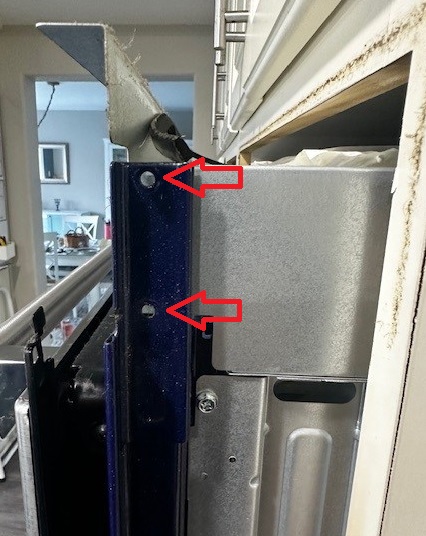
After sliding the oven out away from the wall and cabinets, you should be able to remove the 4 screws holding the front display panel on to the body of the oven. There will be two on each side. The following image shows the two holes where the screws were located. You need to remove them on both sides.
Once you have the screws holding the front display panel on removed, it is time to remove the display. Left and pull out very carefully as you will need to disconnect the two sets of wires connecting the display. The first is the main connector, it is white and there should be a small tab that you can squeeze and disconnect the connector. The next one is the ground wire. Once these are disconnected you can remove the front display panel and set aside.
Removing the Thermal Fuse
The thermal fuse should be towards the front. The first step is to remove the wires on either side. The best way to do this is with two sets of pliers / needle nose pliers. Use one to hold one end of the fuse and the other to grab the wire connector and pull apart. Repeat for the other side. Once the wires are lose you will need to remove the clips. I used the needle nose pliers to squeeze in the tabs as I lifted up.
Remember the orientation of the fuse when you remove it. On my oven the wires were color coordinated to match the end of the fuse they connected to.
Testing the Thermal Fuse
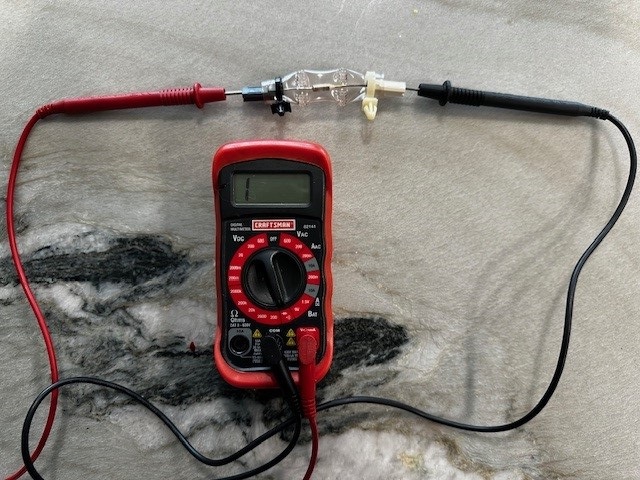
Testing the thermal fuse in your KitchenAid KODE300ESS oven with a multimeter is a crucial step to ensure its functionality. Start by disconnecting the oven from the power source to guarantee safety during the testing process. Set your multimeter to the continuity or resistance setting, and then touch the probes to each end of the thermal fuse. A functional thermal fuse should display low resistance or continuity, indicating an open circuit. If your multimeter shows infinite resistance, it suggests a blown fuse, and replacement is necessary. This simple yet effective testing method allows you to confidently determine the status of the thermal fuse and take the appropriate steps to address any issues.
Testing Oven for Power
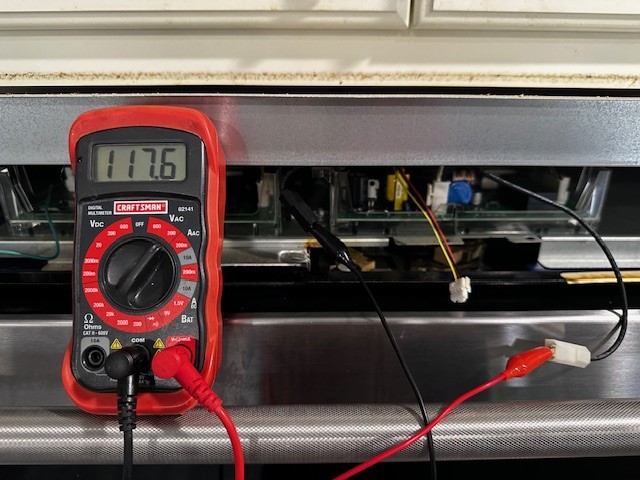
Testing your KitchenAid KODE300ESS oven for power using a multimeter in the location where the thermal fuse was removed is a critical verification step. With the multimeter set to measure voltage (200 Vac), carefully place the probes on the exposed terminals where the thermal fuse would be located. Ensure the oven is turned on, and the multimeter should register the voltage, confirming the presence of power. This test helps ascertain whether power is reaching the thermal fuse location, providing valuable insights into the overall electrical functionality of your oven. Always exercise caution and follow safety guidelines when conducting such tests to avoid accidents.
Replacing the Thermal Fuse
Once you have received your replacement fuse it is time to put it back in. The steps for installing are the reverse of removing the fuse. Make sure power is off to the oven by turning off the breaker. Connect the wires and then insert the clips to the oven body. Then reconnect the front panel display wires and put the panel back in place and insert the 4 screws. Push the oven back in so it is flush and install the 4 screws by open each oven door. Now it is time to turn power back on and hopefully you have success like I did.
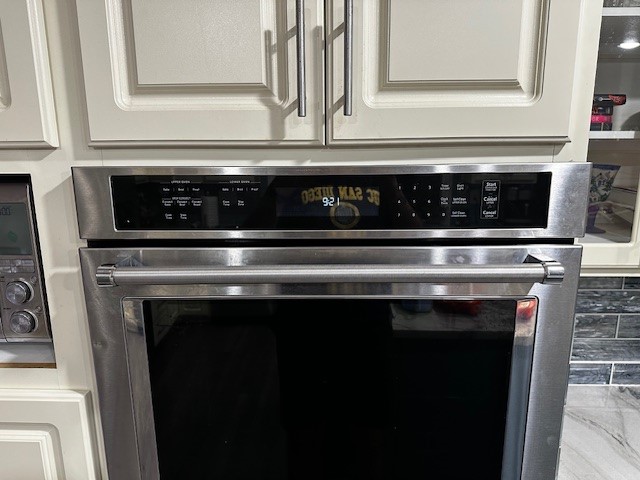
Go Tritons! I realized after I took the photo you can see the reflection of the UC San Diego shirt I had one.
What is a Thermal Fuse?
A thermal fuse is a crucial safety component in appliances, including ovens like the KitchenAid KODE300ESS. It serves as a protective device that interrupts electrical flow when excessive heat is detected. Acting as a failsafe, the thermal fuse prevents potential hazards such as overheating or fire. In the context of the oven display issue, a malfunctioning thermal fuse could be the culprit, causing the display to stop working. Replacing the thermal fuse is a relatively simple but essential task to ensure the safe and proper functioning of the appliance.
Conclusion
If your KitchenAid KODE300ESS display stops working on your wall oven, don’t get too worried as there could be a simple fix to get it back up and running. In my case it just turned out to be the thermal fuse which turned out to be a real easy fix. I was able to detect that the fuse was bad and then needed to wait a couple of days for the part to arrive to get the oven back up and working.


Leave a Reply