When upgrading your RV, one of the most useful projects is getting a better handle on your power situation. The factory-installed monitors are notoriously vague, often leaving you to guess your battery’s true state of charge. For my own rig (2021 Jayco Precept 34G), I decided it was time to ditch the guesswork and perform a Renogy Battery Shunt 300 installation. This upgrade has been a game-changer, giving me a precise, real-time look at my power usage and remaining battery life.
The biggest selling point for me was the wireless connectivity. Like many RVs, the ideal spot for a display was far from my battery bay, and I dreaded the thought of running wires through walls and under floors. The Renogy shunt’s Bluetooth connection to the Renogy ONE Core completely eliminated that problem, making the installation far simpler than I ever expected.
In this guide, I’ll walk you through my process for installing the Renogy Battery Shunt 300. I’ll cover everything from mounting the unit to making the connections, proving that you don’t have to be an electrician to get a professional-level upgrade that gives you peace of mind on the road.
Why Upgrade to a Smart Shunt?
For years, I relied on my RV’s factory-installed monitor—you know the one, with a button and a few vague lights. It was a guessing game. A “full” reading would turn to “half” after just a few hours of watching TV, and I was always worried about running my batteries down too low.
This is where a smart shunt like the Renogy Battery Shunt 300 changes everything. It gives you a precise, real-time look at your power situation. Instead of just a light, you see your battery’s State of Charge as a percentage, just like a cell phone. Even better, you can monitor the Amps In and Out, so you know exactly how much power your fridge is drawing or how many amps your solar panels are putting back in. It even tells you the Time Remaining at your current rate of use, which is invaluable for planning.
But the biggest reason I chose this specific model was the wireless connectivity. My ideal display location was inside the RV, far from the battery bay. Wired monitors would have meant a nightmare of running cables through walls and under floors. The Renogy shunt’s Bluetooth connection to the Renogy ONE Core and the phone app eliminated that hassle completely, making the installation far simpler than I ever imagined.
What You’ll Need
Before you start, make sure you have all the necessary tools and materials. Having everything ready to go will make the installation process much smoother.
Tools
- Drill: For mounting the shunt to a sturdy surface.
- Wrench Set: To tighten the nuts on the battery terminals and the shunt.
- Screwdrivers: You’ll likely need both Phillips-head and flat-head screwdrivers.
- Wire Strippers/Crimpers: Essential for cutting and stripping wires and securely crimping on new lugs.
- Multimeter (Optional): A good tool for checking voltage and continuity, especially if you’re troubleshooting.
Materials
- Renogy Battery Shunt 300: The star of the show.
- Battery Cables: The shunt needs to be wired directly to the negative battery post. You might need to buy new, shorter cables to ensure a clean install. Ensure the cables are the correct gauge for your battery bank.
- Ring Terminals/Lugs: To connect the battery cables to the shunt. Make sure they match the gauge of your cables and the size of the shunt’s terminals.
- Mounting Screws: Included with the shunt, but it’s always good to have some on hand just in case.
- Zip Ties or Wire Loom: To organize and secure your cables, keeping the installation tidy and protected.
Renogy Battery Shunt 300 Installation Steps
Important: Safety First! Before you begin any work on your RV’s electrical system, always disconnect your batteries. This usually involves disconnecting the negative terminal(s) first. Ensure all power to the RV is off to prevent any accidental shorts or shocks.
1. Choosing a Mounting Location
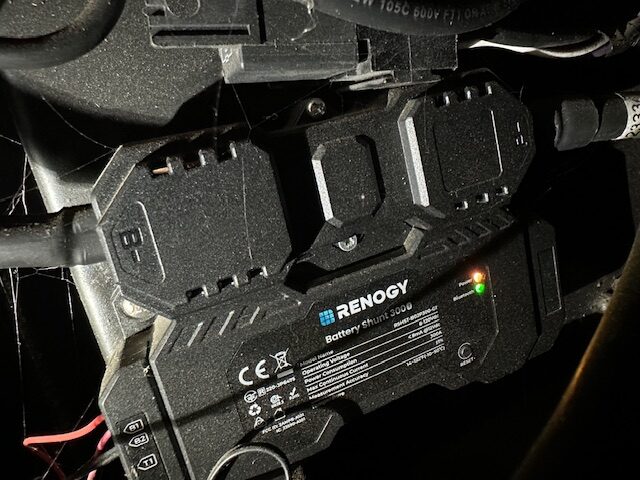
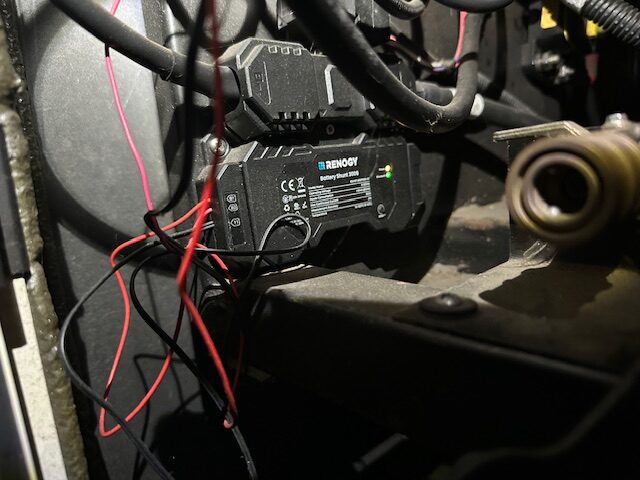
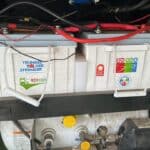
I decided to mount my Renogy Battery Shunt 300 on the side wall inside my RV’s storage bay, close to my coach batteries. When choosing your location, consider the following:
- Proximity to Batteries: The shunt needs to be the first point of contact for the negative terminal of your battery bank. Keep the cable run between the battery and the shunt as short as possible.
- Protection: Select a spot where the shunt is unlikely to be bumped or damaged by other items in your storage bay.
- Bluetooth Signal: While Bluetooth range is generally good, try to avoid enclosing the shunt in a completely shielded metal box if possible, to ensure reliable communication with your Renogy ONE Core or phone.
Once you’ve identified a suitable spot, clean the surface where you plan to mount the shunt.
2. Wiring the Shunt
The wiring of the shunt is straightforward but crucial. The basic principle is that all negative current flow from your batteries to your RV’s DC loads (lights, appliances, etc.) and from your charging sources (solar, shore power converter) must pass through the shunt.
- Main Battery Negative Connection: Disconnect the main negative cable(s) from your coach battery bank. Connect these cable(s) directly to the battery side terminal of the Renogy Battery Shunt 300. Ensure the connection is tight and secure using a wrench.
- Load/Charger Negative Connection: Now, take a new battery cable (or reuse the negative cable you just removed from the battery) and connect it to the load side terminal of the Renogy Battery Shunt 300. The other end of this cable will now serve as the central negative connection point for all your RV’s DC components (lights, water pump, furnace, inverter, etc.) and your charging sources (solar charge controller, converter). Connect all the negative wires that were originally connected to the battery’s negative terminal to this new cable or directly to the load side terminal if space allows and you have appropriate connectors.
- Small Power Wire: The Renogy Battery Shunt 300 requires a small amount of power to operate. It comes with a small gauge positive wire. Connect the ring terminal on this wire to the positive terminal of one of your coach batteries. The other end of this wire plugs into the shunt itself. This wire draws minimal current but is necessary for the shunt’s operation.
3. Mounting the Unit
Once the wiring is complete, position the shunt in your chosen mounting location. Use the provided mounting screws to securely attach it to the surface. Ensure it’s mounted firmly to prevent any movement.
4. Connecting to Renogy ONE Core / Phone App
Now comes the exciting part – connecting wirelessly!
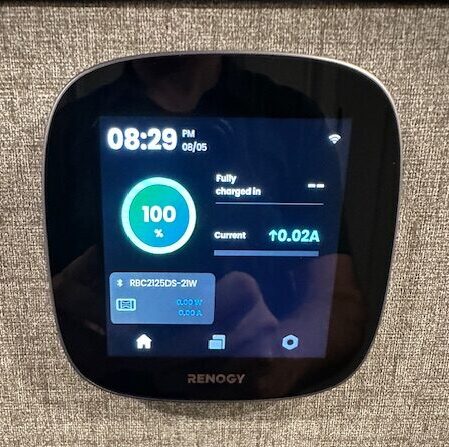
- Renogy ONE Core: Turn on your Renogy ONE Core. Navigate to the device settings and look for the option to add a new Bluetooth device or battery monitor. Follow the on-screen instructions to pair with your Renogy Battery Shunt 300. The shunt should appear in the list of available devices.
- Renogy DC Home App: Download and install the Renogy DC Home app on your smartphone if you haven’t already. Open the app and create an account or log in. Within the app, look for the option to add a new device, specifically a battery monitor. The app will likely scan for nearby Bluetooth devices. Select your Renogy Battery Shunt 300 from the list and follow the pairing instructions.
5. Initial Setup and Calibration
Once connected, you’ll need to configure a few settings within the Renogy ONE Core or the Renogy DC Home app for accurate readings:
- Battery Capacity: Enter the total Amp-hour (Ah) capacity of your coach battery bank. This is crucial for the shunt to calculate the State of Charge and Time Remaining accurately. You’ll find this information on your battery specifications.
- Voltage Settings: The app may allow you to set voltage thresholds for low and high battery levels.
- Synchronization: Some shunts may require a full charge cycle to properly calibrate. The app or Renogy ONE Core should guide you through any necessary synchronization steps.
After the initial setup, take some time to familiarize yourself with the information displayed on the Renogy ONE Core or the app. You should now be seeing real-time data about your battery voltage, current draw, charging current, State of Charge, and estimated remaining capacity.
First Impressions and Benefits
The moment I finished the setup and saw the data pop up on my Renogy ONE Core, I knew this was an upgrade I should have done years ago. It’s hard to overstate the difference between the vague “dots” and the detailed, real-time information provided by the shunt.
Real-Time, Precise Data
The first thing you’ll notice is the State of Charge displayed as a clean, easy-to-read percentage. No more guessing whether “half full” means 60% or 40%. The ability to see exactly how many amps are being drawn by the lights or how much power the fridge is consuming is a true game-changer. I can now actively manage my power consumption and know exactly how much time I have before the batteries need a recharge.
Peace of Mind on the Road
This information translates directly into peace of mind, especially when boondocking or dry camping. I can now run my appliances, charge my devices, and use the lights without that nagging feeling of uncertainty. The “Time Remaining” feature is particularly valuable, as it lets me know if I have enough power to watch a movie or make a cup of coffee without risking a dead battery in the morning.
Ease of Use
The wireless functionality has proven to be a lifesaver. Being able to check my battery status from my phone while sitting outside, or with a quick glance at the Renogy ONE Core mounted near my door, is incredibly convenient. There’s no need to go to a separate panel or navigate through menus. This, combined with the fact that I didn’t have to run a single wire from the battery bay to the display, made this one of the most satisfying and least stressful upgrades I’ve done.
The Renogy Battery Shunt 300 isn’t just a battery monitor; it’s a tool that gives you control over your RV’s power system and confidence in your ability to manage it.
Conclusion
Upgrading your RV’s battery monitor might seem like a daunting electrical project, but my experience with the Renogy Battery Shunt 300 proved it doesn’t have to be. The precise, real-time data it provides—from an accurate State of Charge percentage to your current power usage—is a massive improvement over the vague monitors that come standard in most rigs.
The biggest win for me was the wireless connectivity. By connecting to the Renogy ONE Core and my phone via Bluetooth, I completely avoided the nightmare of running wires across my RV. This made the installation straightforward and stress-free.
If you’re tired of guessing how much power you have left and are looking for an upgrade that offers true peace of mind on the road, I highly recommend this project. It’s a game-changer that puts you in complete control of your RV’s power system.
Have you upgraded your battery monitor? What solution did you choose, and what has been your experience? Let me know in the comments below!






Leave a Reply