The tech we carry on the road is changing fast. From phones and tablets to laptops and cameras, more and more devices are shifting to USB-C. But like many RVers, I found my rig (2021 Jayco Precept 34G) was stuck in the past—filled with old USB-A outlets, 12V sockets, and bulky adapters. Charging was slow, messy, and inefficient. I decided to take matters into my own hands by adding USB-C ports throughout the RV. This small upgrade made a big difference: less cable clutter, faster charging, and a more streamlined setup that better fits the way we travel today. Whether you’re a full-timer or a weekend warrior, upgrading to USB-C is a simple way to modernize your RV and stay powered up on the go.
Why USB-C?
USB-C isn’t just the latest charging trend—it’s quickly becoming the standard for modern devices. Here’s why it made sense to bring USB-C into the RV:
- Faster Charging: Many USB-C ports support Power Delivery (PD), which means they can charge phones, tablets, and even laptops significantly faster than traditional USB-A ports.
- Universal Compatibility: USB-C is used across a wide range of devices—from smartphones and tablets to cameras, headphones, and even some kitchen gadgets. One port, one cable, endless uses.
- Reversible Design: No more fumbling to plug in the right way—USB-C plugs are reversible, making it easier and less frustrating to connect devices, especially in tight RV spaces.
- Fewer Cables: With so many devices using USB-C, we’ve been able to cut down on extra cords and adapters, simplifying our setup and keeping things tidy.
- Future-Proofing: As more electronics shift to USB-C, upgrading now ensures your RV stays compatible with current and upcoming tech for years to come.
Making the switch wasn’t just about convenience—it was about keeping our RV ready for wherever the road (and the technology) takes us.
Planning the Upgrade
Before diving into the install, I took some time to assess what we needed and where. Every RV is different, so a little planning goes a long way.
Assessing Our Current Setup
Our rig had a few outdated 12V outlets and a couple of USB-A ports scattered around, but none of them supported fast charging or USB-C. That meant we were always juggling adapters and charging bricks—not ideal.
Choosing Port Locations
I made a quick list of where we charge devices most often:
- Bedside for phones
- Kitchen area for tablets and small appliances
- Dinette or workspace for laptops
- Dashboard area for navigation gear
If you’re doing this yourself, think about both convenience and power routing—some areas may be easier to wire than others.
Selecting the Right Ports
There are a few styles of USB-C ports available:
- Standalone USB-C: Great for minimal setups focused on newer devices.
- Combo USB-C + USB-A: Ideal if you still have a mix of cables.
- Power Delivery (PD) Ports: These are key if you want to charge high-demand devices like laptops or fast-charge smartphones.
I opted for marine/RV-rated combo ports with PD support to get the best of both worlds—speed, safety, and compatibility.
Power Source Considerations
Since we rely on a 12V DC system, I made sure to:
- Use ports rated for 12V input
- Plan for fusing each port appropriately
- Avoid overloading circuits by spreading out the connections
Some installs may require a voltage regulator or step-down module—especially if you’re tapping into higher-voltage sources or wiring directly from batteries.
Taking the time to plan meant the installation was smoother, safer, and customized for how we actually live in our RV.
Parts & Tools Needed
Once I had a plan in place, it was time to gather everything needed for the install. The good news? This is a relatively simple upgrade with minimal tools required—especially if you’re comfortable working with basic 12V wiring.
Parts
- USB-C Charging Ports
Look for marine- or RV-rated models with built-in voltage regulation and Power Delivery (PD) support. Combo USB-A + USB-C ports offer more flexibility. I ordered the following: USB C Car Charger Socket 12V USB Outlet 2 Pack.
- Appropriate Wire
Typically 12 or 14 AWG stranded copper wire is sufficient, depending on the amperage draw and distance from the power source. - Inline Fuse Holders or Fuse Block
Every port should be fused appropriately to protect against short circuits or overloads (commonly 5–10 amps per port). The charging ports I purchased came with inline fuse holders already attached to the wires. - Connectors & Terminals
Use crimp-on connectors (spade, ring, or butt connectors as needed) with heat shrink tubing for secure, weather-resistant connections. - Switches (Optional)
If you want to be able to turn off the ports when not in use, consider adding a 12V switch inline. The port I purchased had a built in on/off button.
Tools
- Drill & Hole Saw Bits & Step Bit
For mounting the USB-C ports cleanly in cabinets or panels. - Wire Strippers & Crimping Tool
Essential for making strong, clean connections. - Multimeter
To check for voltage, test continuity, and confirm proper wiring before finalizing connections. - Screwdrivers & Wrenches
For removing panels or accessing fuse blocks and battery terminals. - Zip/Cable Ties or Loom
For organizing and securing wiring once everything is installed. - Masking Tape
For protecting surface when drilling. Can also be used to tape plastic bag under where you are drilling to catch any debris. - Vacuum
Clean up any mess you make. - Rotary Tool / Dremel
Clean up any mess you make.
This simple toolkit makes the project approachable even for beginner DIYers—and you may already have most of it on hand. Just be sure to double-check all components for compatibility with 12V systems and always follow basic electrical safety practices.
Installation Process
With everything planned and your tools ready, it’s time to install the USB-C ports. The process is straightforward, but attention to detail ensures a safe and clean upgrade.
1. Disconnect Power
Before touching any wiring, disconnect your RV’s battery or turn off the power at the fuse panel. Safety first—always avoid working on live 12V circuits.
2. Accessing Wires and Mounting Location
After disconnecting power you will need to access where the wires will need to run. For my installation I unfolded the sofa to expose access port under televator in my RV and also popped out the electrical outlet near where I planned to install the new USB-C port.
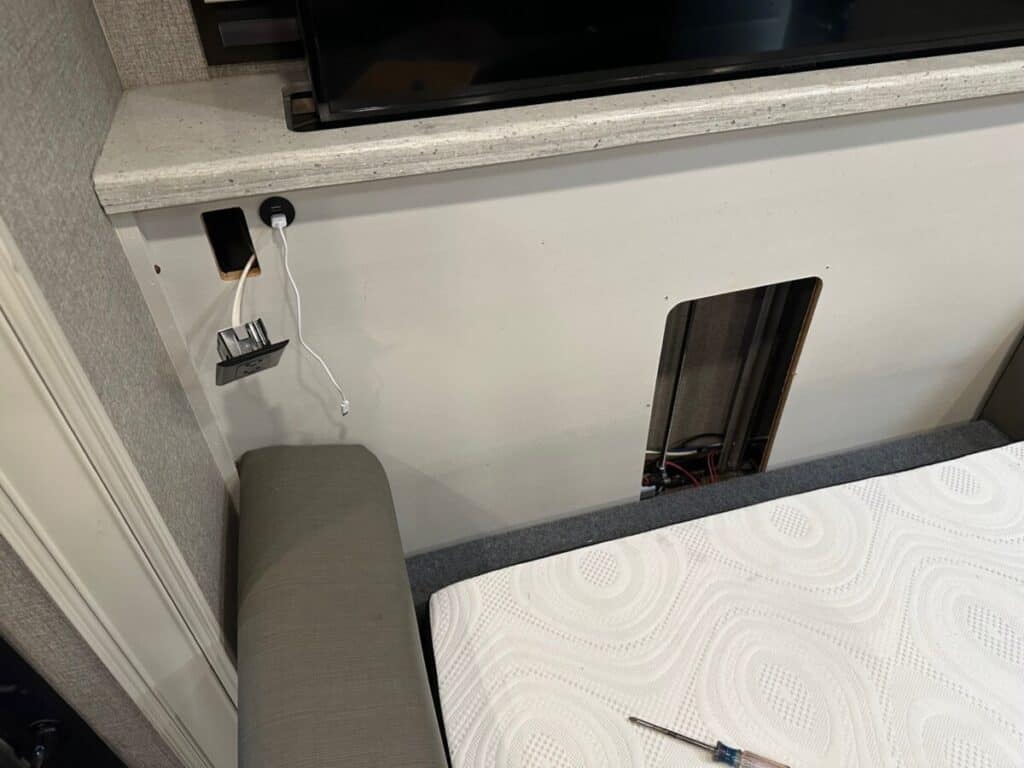
Warning: When removing the electrical box, the plastic clips that are on the backside of the screw that pressure mount the electrical box to the wall fell off. I was able to retrieve them through the access hatch at the base of the televator.
3. Prep Your Mounting Locations
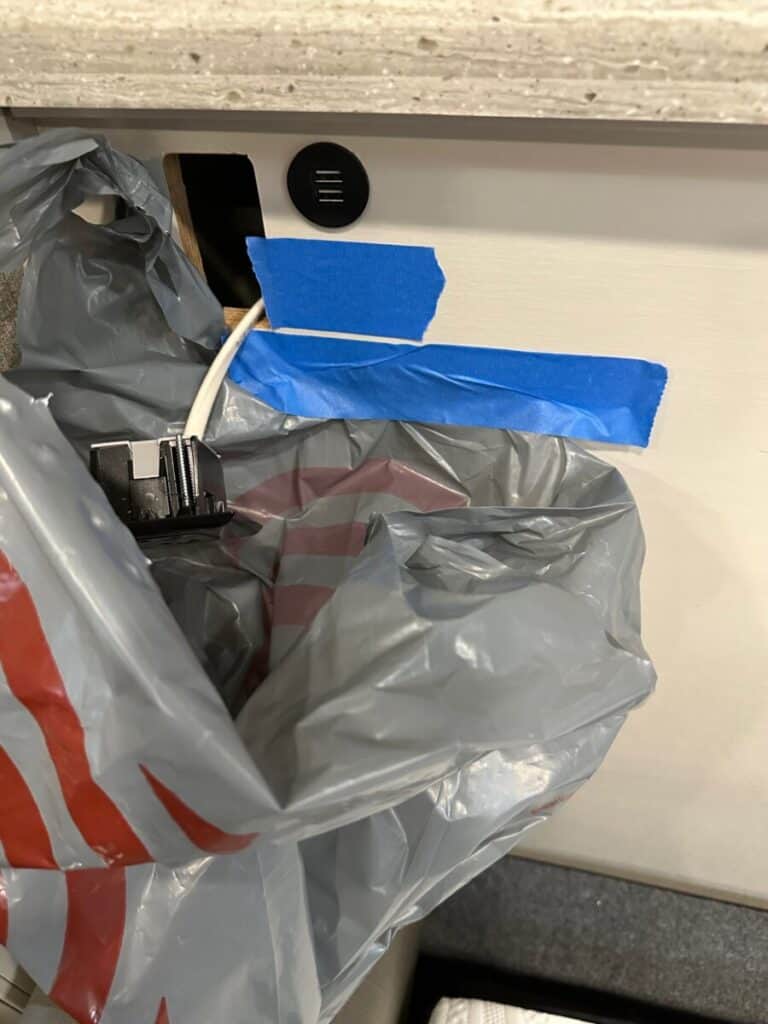
Choose clean, flat surfaces near where you want to charge devices. Use a hole saw to drill the correct size opening for your USB-C port (usually noted on the port’s spec sheet). Clean up rough edges if necessary.
Pro Tip: When drilling hole, use masking tape to protect surface. This helps prevent splintering. I also tape a plastic bag under where I am drilling to catch as much debris as possible.
4. Run Wire from Power Source
Use 12 or 14 AWG stranded wire to connect each USB-C port to your power source:
- If connecting to your RV’s 12V fuse panel, add a fuse appropriate for your port’s current draw (typically 5–10 amps).
- If wiring directly from the house battery, install an inline fuse close to the battery for protection.
Route the wire cleanly through walls, cabinets, or conduit using cable ties or wire loom to prevent chafing.
5. Make Your Connections
Strip the wire ends and use crimp connectors (with heat shrink tubing if possible) to connect the power and ground wires to the port’s terminals. Double-check polarity:
- Red or positive wire → + terminal
- Black or negative wire → – terminal
For my installation, I just taped into the existing wires for the already installed USB-A port. This was connected to a couple of 3 conductor Wago connectors with a spare slot in each.
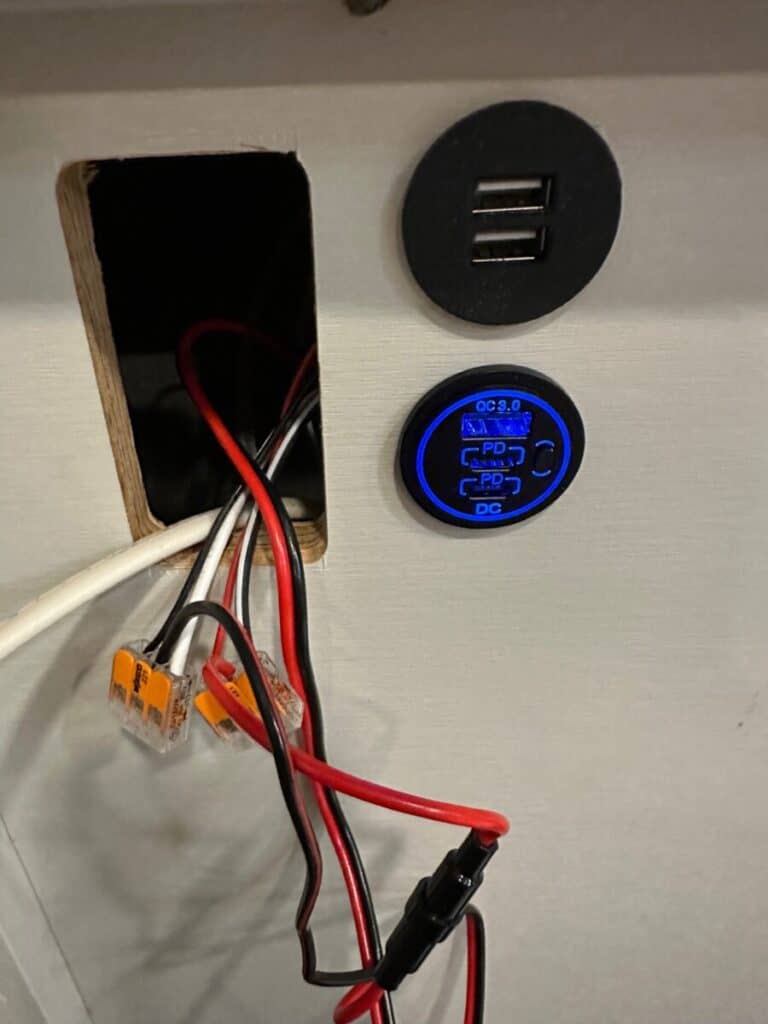
Incorrect wiring can damage your port or device, so test connections with a multimeter if you’re unsure.
6. Mount the USB-C Port
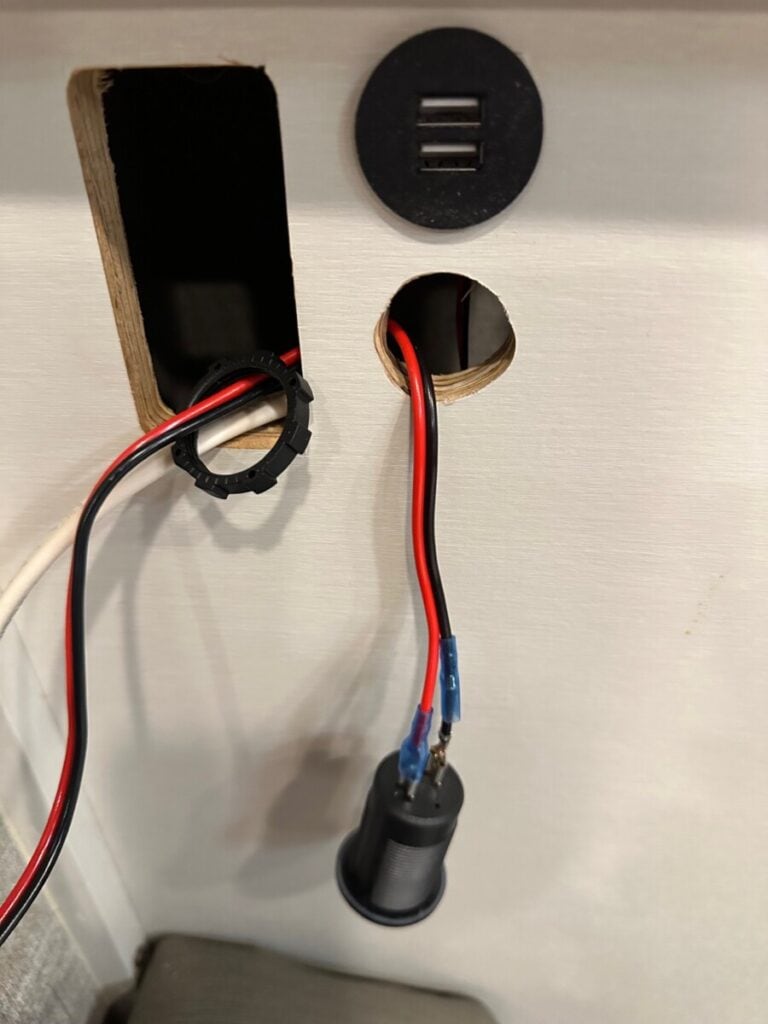
Secure the port into the drilled hole using the included hardware or mounting plate. Some models use a threaded ring, others screw in from the front. Note that this step may need to come before the previous step if you are using the nut method or you at least need to put the nut on the wires before finishing the wiring.
The port I was installing used a threaded ring that you could tighten against the backside of the place you are mounting the charging port.
7. Test the Port
Once everything is connected and secured, reconnect your RV’s power and test the new USB-C port:
- Use a multimeter to check voltage
- Plug in a device to confirm charging
- Test Power Delivery (PD) if supported by your port and device
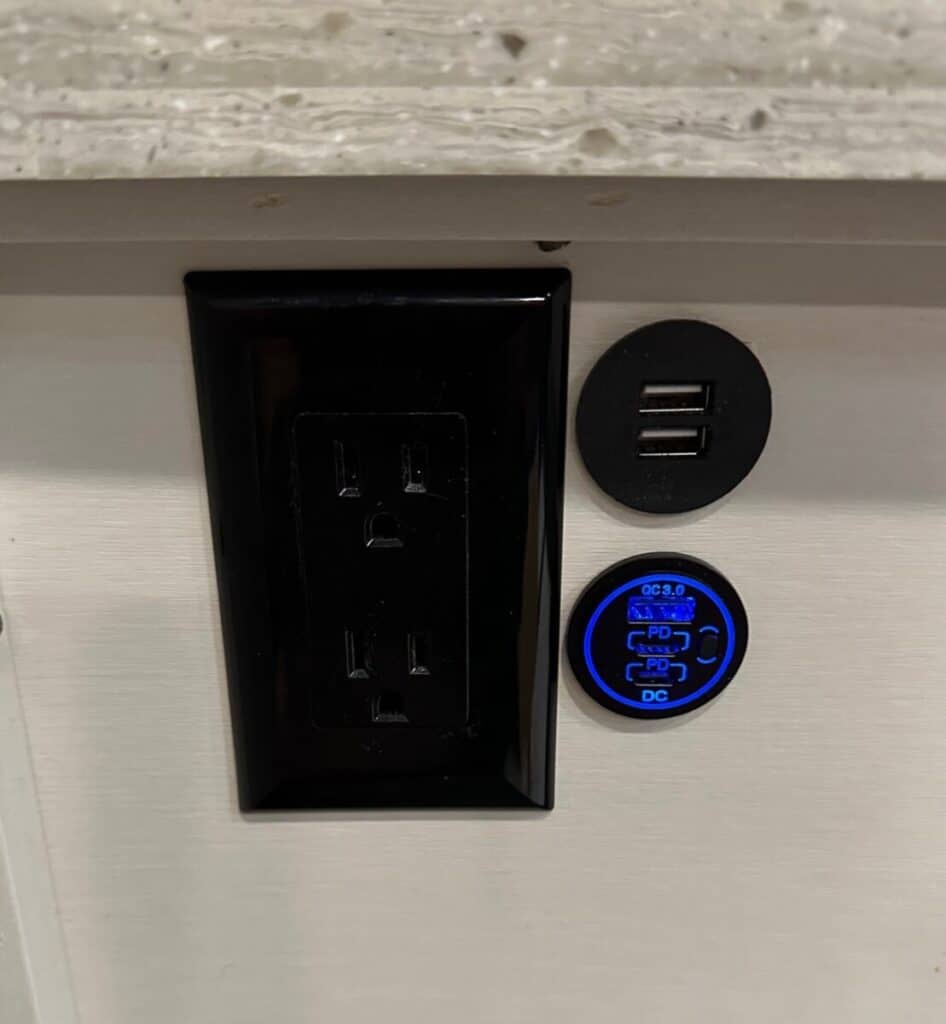
8. Final Touches
Tidy up any visible wiring, label your new fuse(s), and double-check that everything is secure. Vacuum up any debris from drilling and sanding and put away all your tools. If you installed multiple ports, repeat the process as needed.
Tips & Lessons Learned
Like any RV upgrade, adding USB-C ports came with a few valuable takeaways. Here are some tips to help your install go smoothly—and maybe even better than mine.
1. Choose Quality Ports
Not all USB-C ports are created equal. Stick with reputable brands, especially those designed for automotive or marine use. Cheap or off-brand models often lack proper voltage regulation, heat resistance, or fuse protection—and that can be a fire risk in an RV.
2. Go with Combo Ports if You’re Not Fully USB-C Yet
If you still use a few older USB-A devices, opt for a combo USB-A + USB-C port. It gives you flexibility without needing extra adapters.
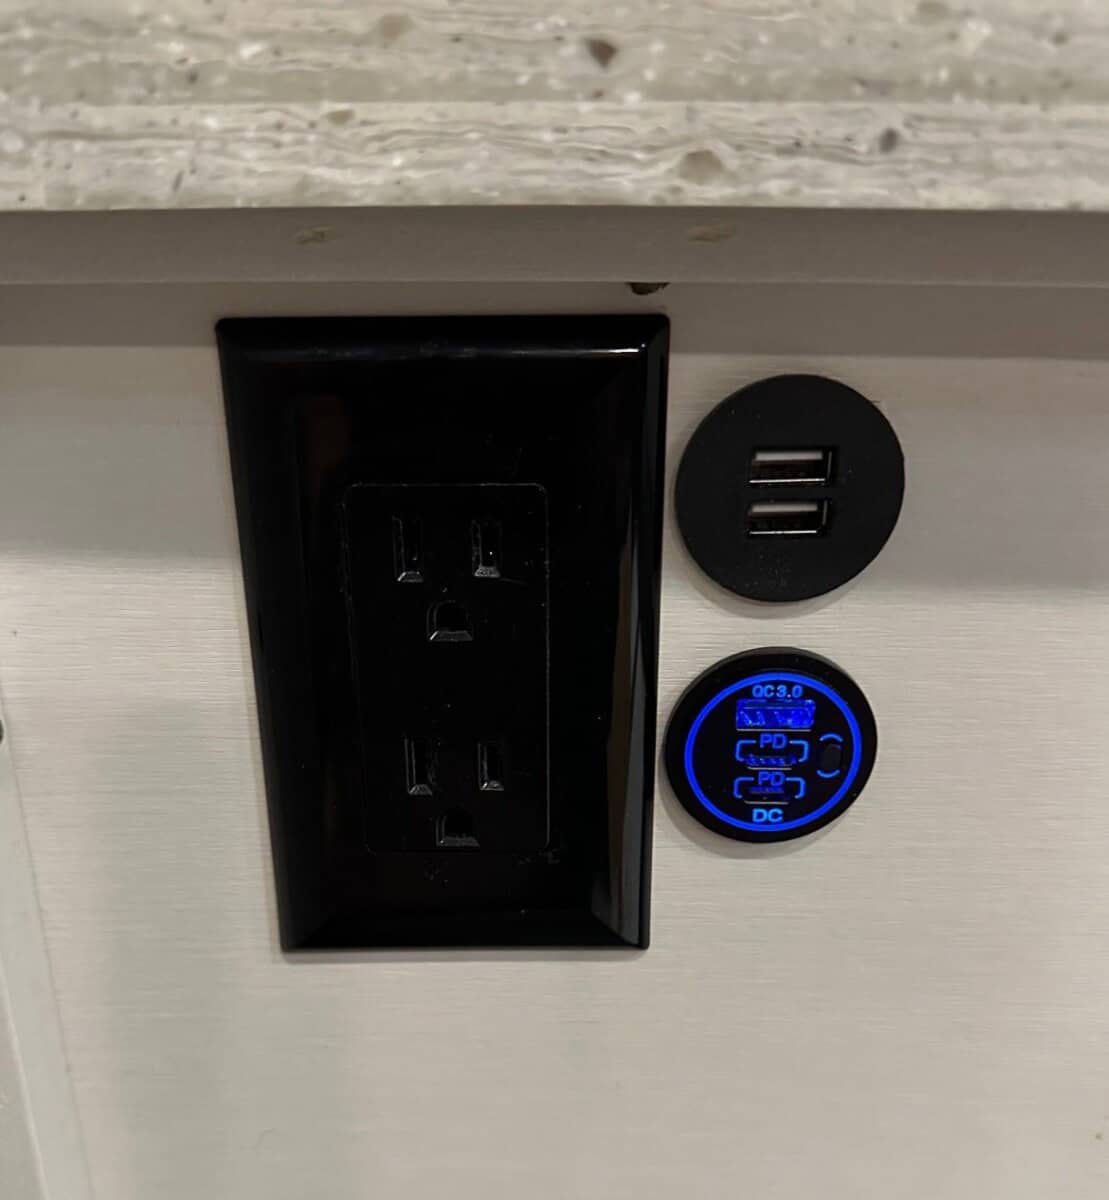
The port I used included 2 USB-C ports and 1 USB-A port.
3. Don’t Skip Fuses
Every connection to your 12V system should be fused. This protects both your devices and the RV’s wiring in case of a short or overload. Use inline fuses close to the power source if you’re wiring directly to the battery.
4. Use a Multimeter—Not Just Visuals
I double-checked all my connections with a multimeter before powering up. It’s a quick step that can prevent major headaches—especially when it comes to identifying reversed polarity or low voltage drops.
5. Plan for Power Draw
High-wattage USB-C ports (especially PD ones used for laptops) draw more current than basic USB-A chargers. Be mindful not to overload existing circuits—spread your installs across different fuse blocks or power zones if needed.
The ports I selected have an on/off button so that you can turn it off if not in use.
6. Label Everything
If you’re adding ports to your existing fuse panel, label the new fuses. It’ll save you time later—and whoever works on your RV in the future will thank you.
For my install, I was just taping off an existing USB-A port, so no need to add a new fuse to the fuse box.
7. Secure Your Wiring
Use cable ties, clips, or loom to prevent wires from sagging or chafing, especially behind panels or near moving parts. A tidy install isn’t just aesthetic—it’s safer and more durable on bumpy roads.
I installed my USB-C port right next to the Televator on my RV. You need to pay attention to where the wires are left so they do not interfere with the televator.
Conclusion
Upgrading your RV by adding USB-C ports is a simple, practical way to keep pace with modern technology and improve your travel experience. With faster charging, fewer cables, and compatibility across a wide range of devices, USB-C ports bring convenience and efficiency to life on the road.
Whether you’re charging phones at the campsite, powering laptops in your workspace, or just cutting down on clutter, this upgrade future-proofs your rig and makes everyday living easier. If you’re comfortable with basic wiring and have a bit of patience, it’s a rewarding DIY project that anyone can tackle.
Ready to take your RV’s power setup into the future? Grab your tools, plan your install, and enjoy the benefits of USB-C wherever the road takes you!







Leave a Reply