
Welcome back, fellow DIYers! If you’ve been following my journey, you know I’m all about upgrading my rig (2021 Jayco Precept 34G) for off-grid adventures. We’ve already covered swapping out old lead-acid batteries for a shiny new lithium setup and adding solar panels to the roof. Now, it’s time to tie everything together with a crucial piece of the puzzle: a DC-DC battery charger with an MPPT controller. This post will walk you through the Renogy DC-DC charger installation, a project that’s much simpler than it sounds.
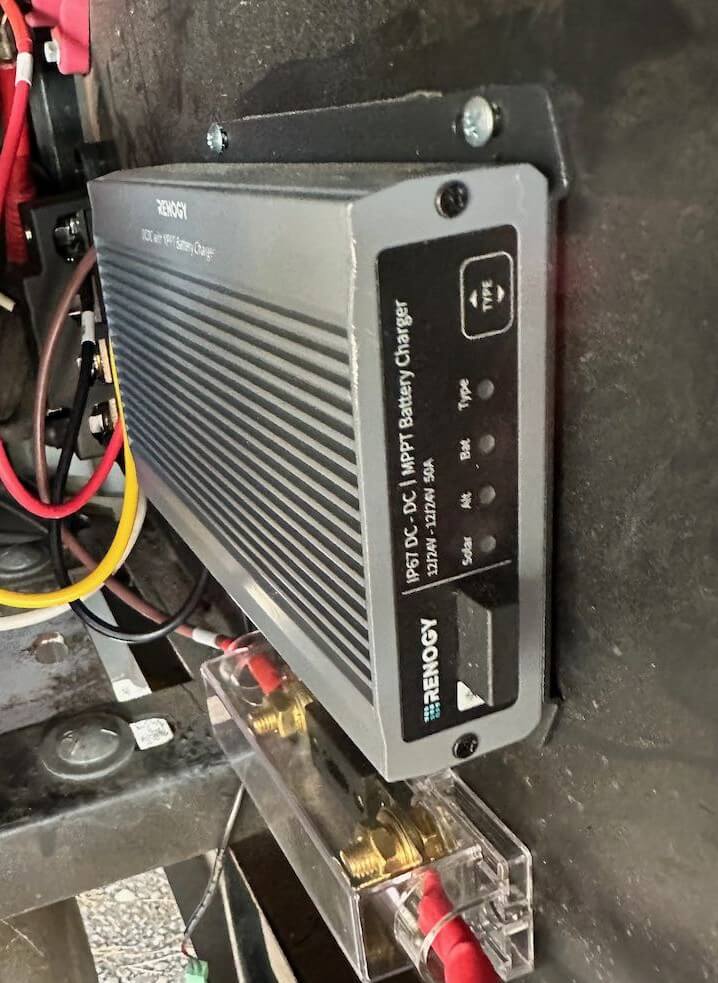
I chose the Renogy 12V/24V IP67 50A DC-DC Battery Charger with MPPT (RBC2125DS-21W-US) for a few key reasons. First, it handles both 12V and 24V systems, giving me flexibility. The most significant factor, though, was its IP67 rating. Since my battery and propane bay isn’t fully enclosed, I needed something that could withstand the elements—and this charger is built for exactly that.
Why a DC-DC Charger?
So, why even bother with a DC-DC charger? Simply put, it’s the smartest way to charge your house batteries from your vehicle’s alternator. While you could use a simple battery isolator, it’s not the most efficient or safest method, especially with lithium batteries. An isolator can cause your alternator to overheat, and it doesn’t provide the correct charging profile that lithium batteries need to perform their best and last a long time.
Note: My 2021 Jayco Precept 34G came with a BIM 225 battery isolation manager. I ended up bypassing this by disconnecting it from the batteries. This way I didn’t need to relocate all the wires and find another place to connect them.
A DC-DC charger, on the other hand, acts as a sophisticated charging brain. It takes the power from your vehicle’s starting battery and precisely regulates it to charge your house batteries correctly. It’s like having a dedicated battery charger built into your vehicle’s charging system.
This particular Renogy model is even better because it has a built-in MPPT (Maximum Power Point Tracking) controller. This means it can also manage the power coming from your solar panels. It optimizes the voltage and current from your solar array to maximize the energy your batteries receive, ensuring you get the most out of your panels, even on cloudy days. Essentially, this single unit handles two critical charging functions, making your power system more efficient and reliable.
Tools and Materials
Before we get started, it’s important to have all of your tools and materials ready to go. A little prep work here will save you a lot of time and frustration down the road.
Tools:
- Drill: To mount the charger to the wall.
- Socket Set or Wrench: To tighten the mounting bolts or screws.
- Wire Strippers: For stripping the insulation from your wires.
- Wire Crimpers: To properly secure the lugs onto your wires.
- This is the Hand Operated Hydraulic Crimping Tool I used for this project.
- Voltmeter or Multimeter: To test connections and confirm voltage.
- Wire Cutters: To cut the wires to the correct length.
- Safety Glasses: A must-have for any DIY project.
Materials:
- Renogy 12V/24V IP67 50A DC-DC Battery Charger with MPPT: This is the star of the show!
- Appropriate Gauge Wire: Be sure to use the correct gauge wire for your connections. For the main power connections to your batteries, a thicker gauge is necessary to handle the 50A current. Refer to the Renogy manual for specific recommendations.
- Fuses and Fuse Holders: You’ll need an appropriate fuse for the brown ignition wire and the main positive wire to protect your system.
- Bus Bars: I used a black bus bar for all my negative connections and already had a red one for my positive connections. This keeps things organized and clean.
- Wire Lugs: To terminate the wires and connect them to the bus bars and fuses.
- Marine-grade Heat Shrink Tubing: To protect your connections from the elements, especially in a bay like mine that isn’t fully enclosed.
- Battery Disconnect Switch: To control the solar input to the charger.
- Mounting Hardware: Screws or bolts to secure the charger to the wall.
- Zip Ties or Wire Clamps: For cable management to keep your wiring neat and secure.
Step-by-Step Installation Guide
Now for the fun part! Follow these steps carefully to ensure a safe and successful installation. Remember, always disconnect your batteries and any power sources before you start working on your electrical system.
Step 1: Planning and Mounting
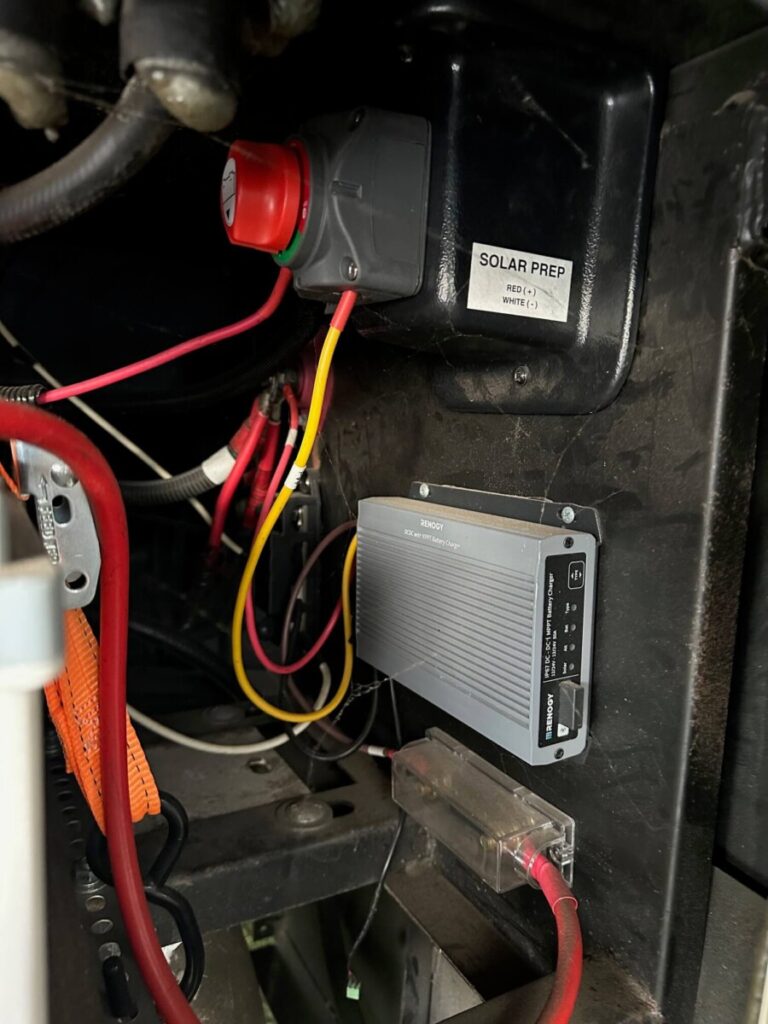
First, find a good location for your charger. I opted for the side wall of my battery and propane bay. This spot was close to my batteries and solar wires, making the cable runs short and efficient. It was also out of the way, so it wouldn’t be damaged by shifting gear.
Once you have your spot, use the mounting holes on the charger as a template to mark where you’ll drill. Drill your pilot holes, and then securely mount the charger to the wall. Double-check that it’s level and firmly in place—you don’t want it rattling around on bumpy roads.
Step 2: Wiring the Ground Connection
Keeping your wiring organized is key. I installed a black bus bar specifically for all my negative (or ground) connections. This keeps everything clean and easy to troubleshoot later.
Take the thick black wire from the Renogy charger and crimp a lug onto the end. Then, connect this lug to your black bus bar. This completes the ground connection for the charger.
Step 3: Connecting to the Auxiliary Battery
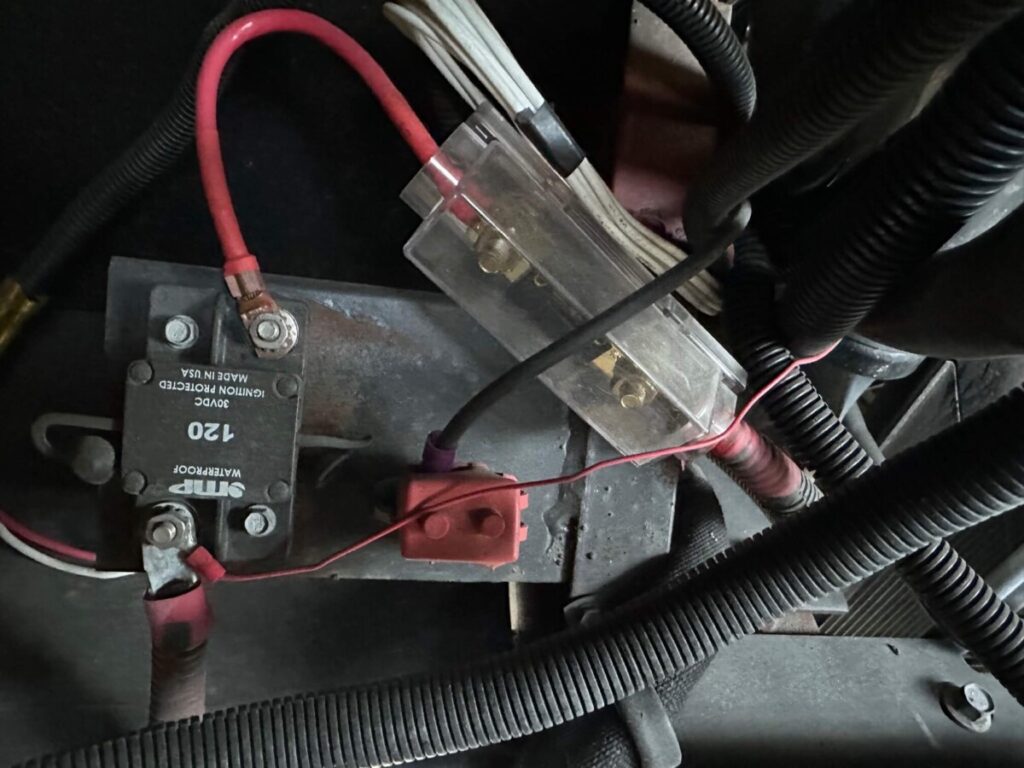
The red wire is the wire that connects the battery charger to your auxiliary battery. Renogy recommends a ANL fuse (60A). I mounted the fuse near the charger and then crimped a lug onto the red wire and attached it to one end of the fuse and then connected another cable from the other end of the fuse to the positive terminal on my battery setup.
Step 4: Connecting the Solar Input
This step is what makes this charger so great. The yellow wire is for your solar input. I wanted to be able to turn my solar panels off separately from the rest of the system, so I added a simple battery disconnect switch.
I installed the switch right into the plastic cover where my solar prep wires were located. I ran the yellow wire from the Renogy charger to one side of this switch. Then, I connected the positive wire from my solar panels on the roof to the other side of the switch. This setup lets me control the flow of solar power with a simple flick of a switch.
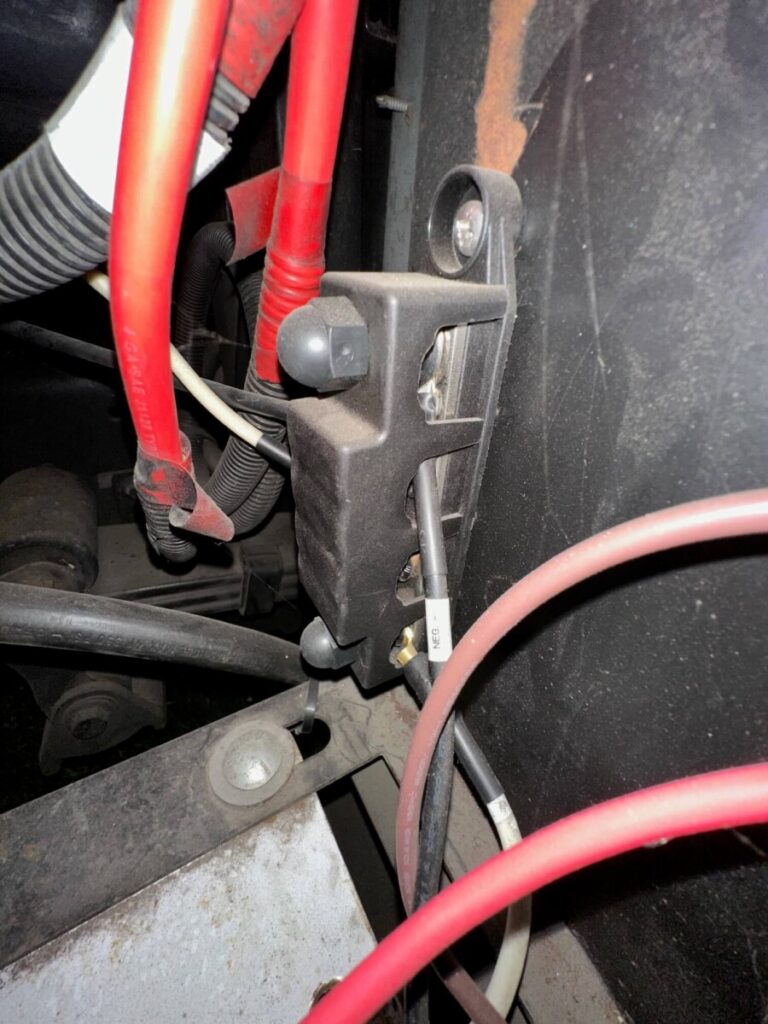
Step 5: Wiring the Starter Battery Connection
The thick red wire from the charger is what connects to the starter battery. I already had a wire running from the front of the RV back to the storage bay and terminating on a bus bar. Take the red wire from the charger, crimp a lug on it, and connect it to your positive bus bar.
Renogy recommends a ANL fuse (70A). This was installed close to the starter battery.
Step 6: Optional Temperature Sensor
The Renogy charger comes with a temperature cable. This cable is designed to be attached to your batteries and provides a temperature reading to the charger, allowing it to adjust its charging profile for optimal performance.
I did not connect this cable because I already had a separate, dedicated battery monitoring system that monitors my battery temperature. If you don’t have a separate system, I highly recommend you connect this cable to ensure your batteries are being charged safely and efficiently.
Final Checks and Testing
You’re almost there! Before you button everything up and hit the road, it’s crucial to do a final review of your work to make sure everything is connected properly and safely.
Checklist for Success:
- Double-Check Your Connections: Go back through each step and physically tug on every wire and connection point. Ensure all lugs are securely crimped, and all nuts and bolts are tightened. Loose connections can lead to poor performance or, worse, a fire hazard.
- Verify Polarity: Make sure the red wires are connected to positive terminals and bus bars, and the black wires are connected to negative terminals and bus bars. Mixing these up can cause serious damage to your charger and batteries.
- Confirm Fuses are in Place: Check that the appropriate fuses are installed on both the main positive wire and the brown ignition wire. Fuses are your system’s first line of defense against electrical shorts.
- Neat and Tidy Wiring: Use zip ties or wire clamps to bundle your wires neatly. This not only looks professional but also prevents wires from snagging or rubbing against surfaces, which can lead to chafing and shorts over time.
Testing the System:
Once you’re confident in your wiring, it’s time to test the system.
- Solar Test: With your vehicle’s engine off, turn on the solar switch you installed. The Renogy charger’s indicator lights should show that it is receiving power from your solar panels and is charging your batteries. If you have a battery monitor, you’ll see a positive amp flow into your batteries.
- Alternator Test: Turn your solar switch to the “off” position. Start your vehicle’s engine. The charger should now switch modes and begin pulling power from your starting battery to charge your house batteries. Again, your battery monitor should show a strong charging current.
If all the lights are on and your batteries are charging as expected, congratulations! You have successfully completed your Renogy DC-DC charger installation. Enjoy the peace of mind that comes with a perfectly integrated and efficient charging system.
Conclusion
Congratulations! You’ve successfully installed the Renogy DC-DC charger, and with it, you’ve taken a major step toward a more reliable and self-sufficient power system. By integrating this single unit, you now have a setup that can efficiently charge your batteries from both your vehicle’s alternator while you drive and from your solar panels when you’re parked. This dual-charging capability means you’ll spend less time worrying about power and more time enjoying your adventures.
This project is a perfect example of how small, smart upgrades can make a huge difference in your off-grid experience. If you’re looking to continue building out your power system, be sure to check out the other posts in this series, where we cover everything from battery selection to solar panel mounting.
If you have any questions about the installation process or run into a snag, leave a comment below! Happy adventuring!


Leave a Reply