Introduction
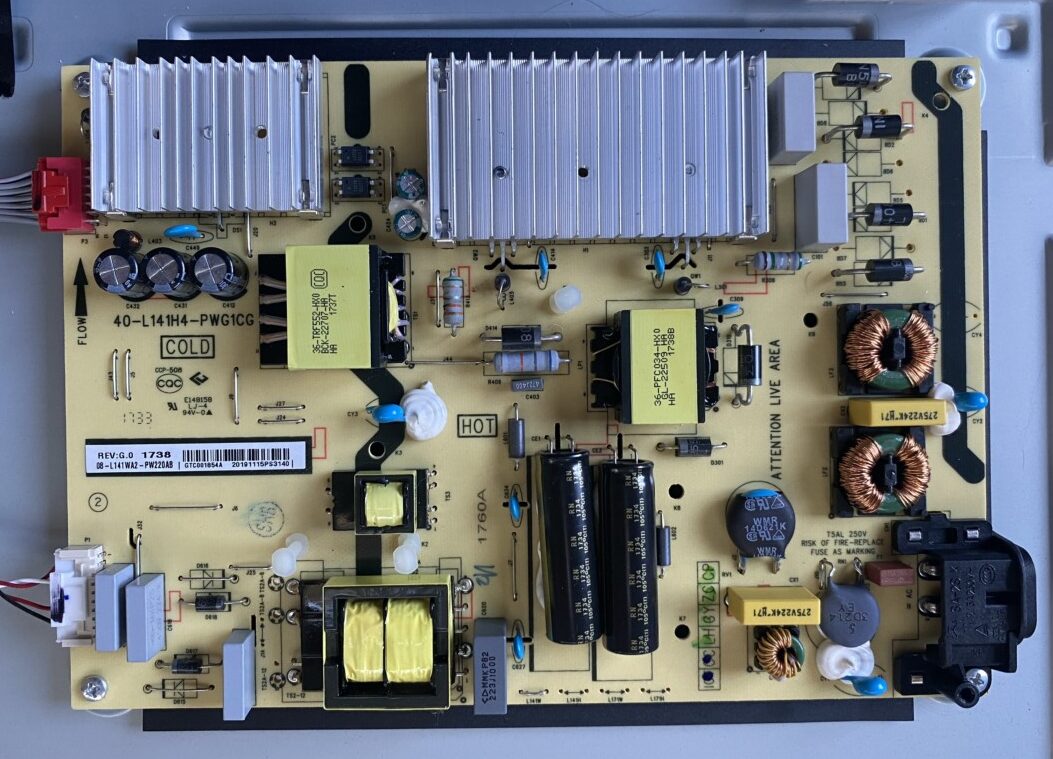
You tried all the most common steps for why your TV will not turn on and still no luck getting the TV to turn on. This is the situation that I was in with my TV. At this point I was pretty sure the issue was with the power supply board on my TV.
Tools and Materials
Note: Before proceeding with the power supply board replacement, ensure that you have the necessary replacement part and the appropriate tools. The part I needed was the 08-L141WA2-PW220AB. Make sure this is the exact part you need or purchase the one that fits your TV. If you’re not confident in performing the task yourself, it’s recommended to seek assistance from a qualified technician.
Tools
- Screwdriver
- Blanket (used to lay TV down on to protect screen)
- Bowl (used to keep screws secure)
Procedure
1 – Safety Precautions
- Turn off and unplug the TV from the power outlet
- Allow the TV to sit for at least 15-30 minutes to discharge any stored electricity
- work on a clean, flat surface with sufficient lighting
- Accessing the power supply board
2 – Accessing the Power Supply Board
- Locate the back panel of your TLC TV.
- Use a screwdriver to remove the screws securing the back panel in place.
- Carefully remove the back panel to expose the internal components of the TV.
3 – Identifying the Power Supply Board
- Locate the power supply board within the TV. It is usually a large circuit board where the power cord connects.
- Take note of the connections and cables attached to the power supply board.
- If necessary, take pictures or make a diagram to help you remember the cable placements during reassembly.
4 – Disconnecting Cables and Components
- Begin by disconnecting the power cable that connects the power supply board to the main board.
- Carefully unplug any other cables or connectors attached to the power supply board. These may include ribbon cables, data cables, and other power cables.
- Take note of the connection types (e.g., clips, connectors, screws) and how they are secured.
5 – Removing the Power Supply Board
- Once all cables and connectors are disconnected, use a screwdriver to remove any screws securing the power supply board to the TV chassis.
- Gently lift the power supply board away from the TV chassis, being cautious not to damage any other components or cables.
6 – Installing the New Power Supply Board
- Take the replacement power supply board and align it correctly with the TV chassis.
- Secure the board in place using the screws you removed earlier.
7 – Reconnecting Cables and Components
- Begin reconnecting the cables and connectors to the new power supply board, following your notes or diagrams for proper placement.
- Ensure that all connections are secure and properly seated. Double-check for any loose or missed connections.
8 – Reassembling the TV
- Carefully put the back panel of the TV back in place.
- Use the screwdriver to reinsert and tighten the screws that secure the back panel.
9 – Powering on the TV
- Plug the TV back into the power outlet.
- Turn on the TV and check if the new power supply board resolves the issue.


Leave a Reply